We're finally reaching part which will be less technical and more creative. As you've probably noticed, Corona is not very complicated in terms of setting up either the rendering or the scene - there are just some basic rules you need to follow in order to have everything working nicely. It's no different with Corona shaders - general workflow is easy to follow and requires only few things to be remembered.

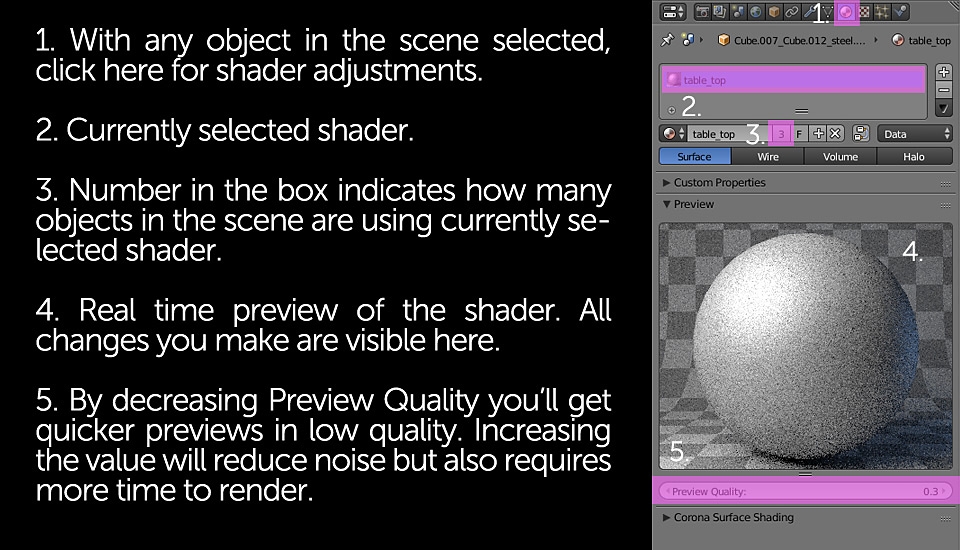
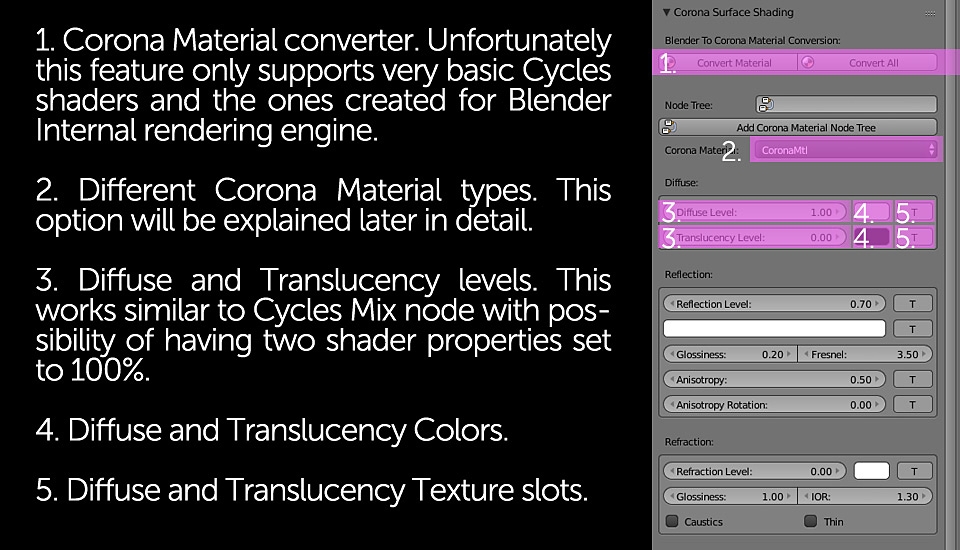
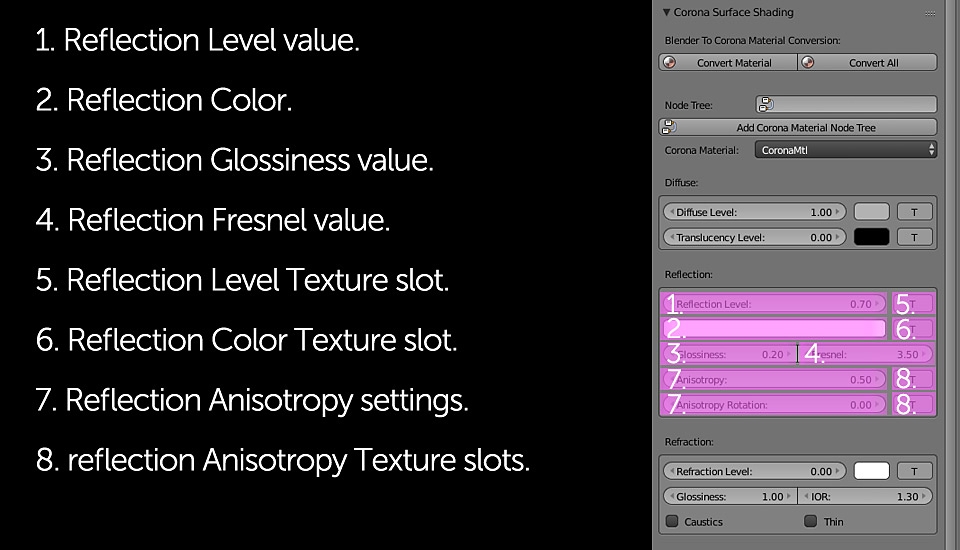
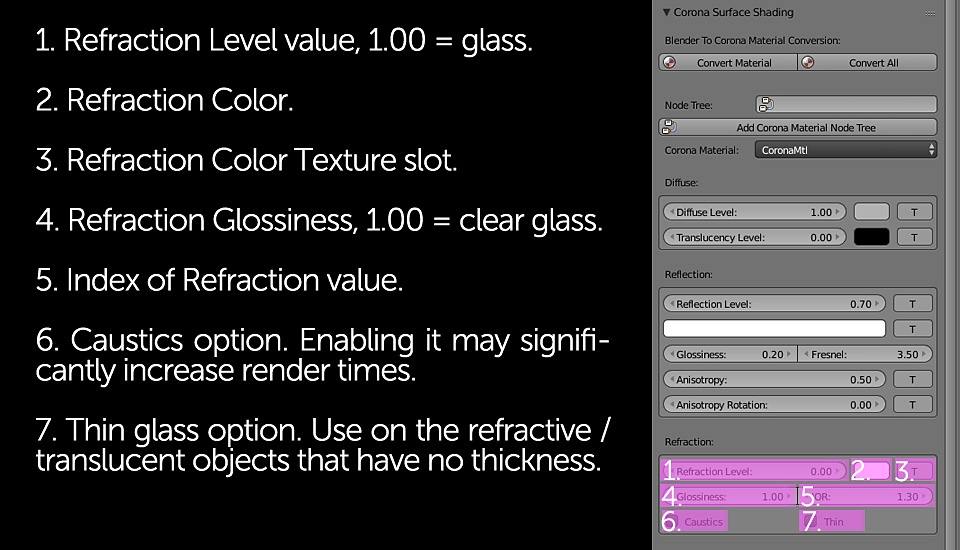
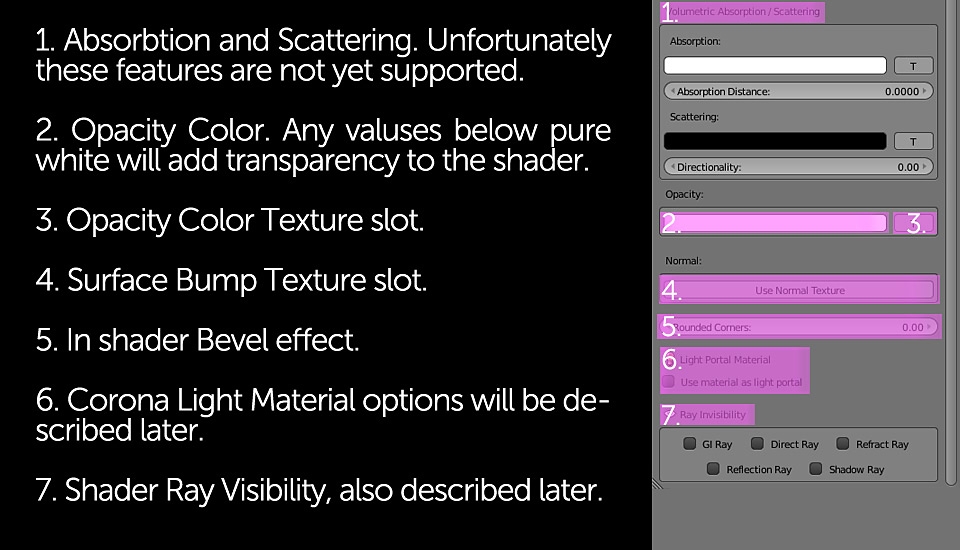
At the time of writing this tutorial, Corona shading system was more similar to Blender Internal or V-Ray rather to Cycles. This means that almost everything can be set from the Properties menu without using any Shading Nodes. For some people the way Blender handles textures in Corona it may be a bit strange but I hope that slideshows below will make it more clear. Let's start with quick overview of the most important settings:


Since I'd like this tutorial to be as simple and Corona only focused as possible, I won't be explaining the whole story behind how CG shaders work and what does Fresnel or Diffuse mean. If you'd like to read more on these topics I strongly recommend tutorial linked below:
01/01/2017 Featured
Shaders, Materials and Textures in Blender
Cycles tutorial on creating realistic materials in Blender. Improve your architecture renderings by learning how to create proper shaders.
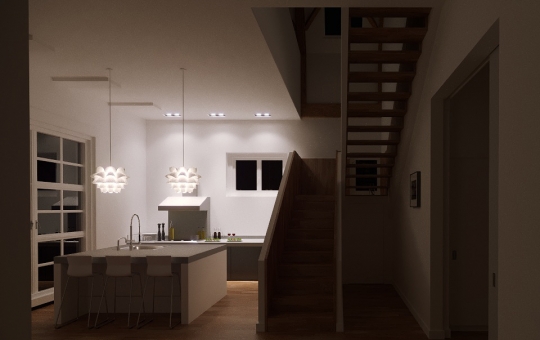
The scene I've used in this tutorial consists mostly of different modifications of the shaders you can find below. They're easy to create and adjust so you can apply them in may different forms, quickly setting up the whole interior.
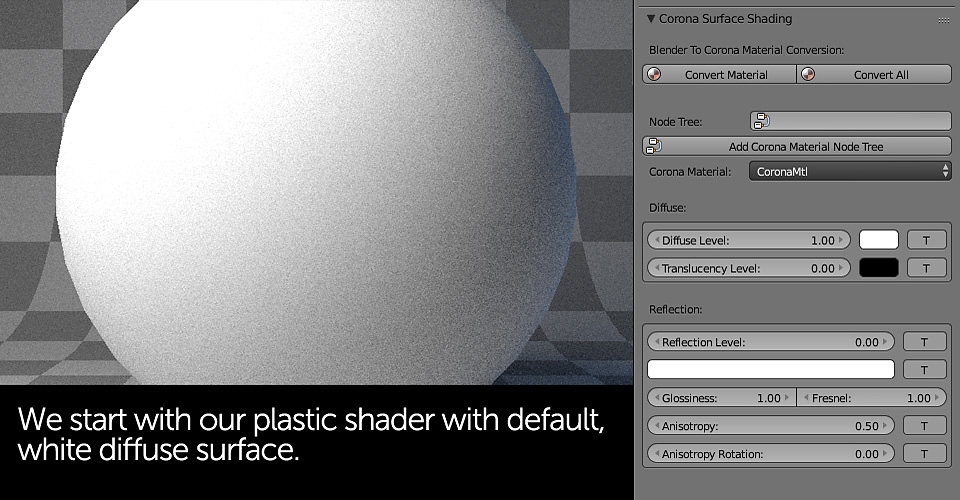
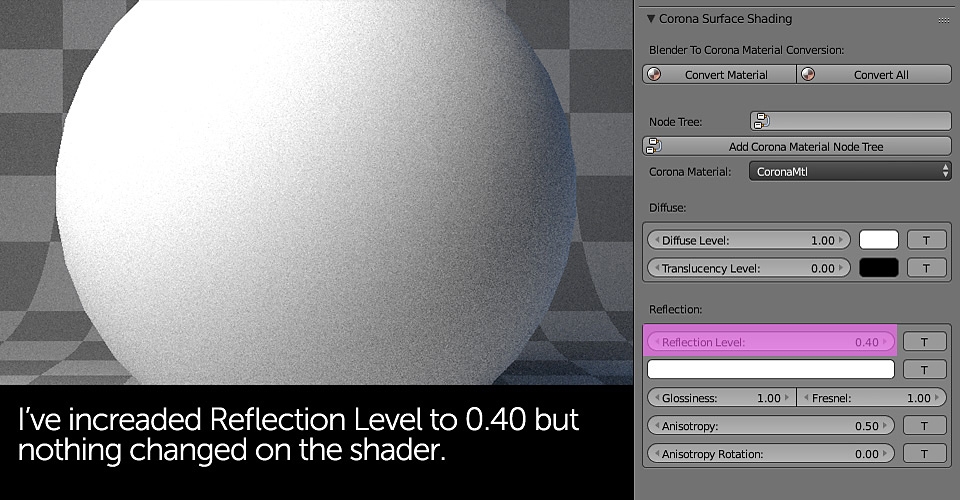
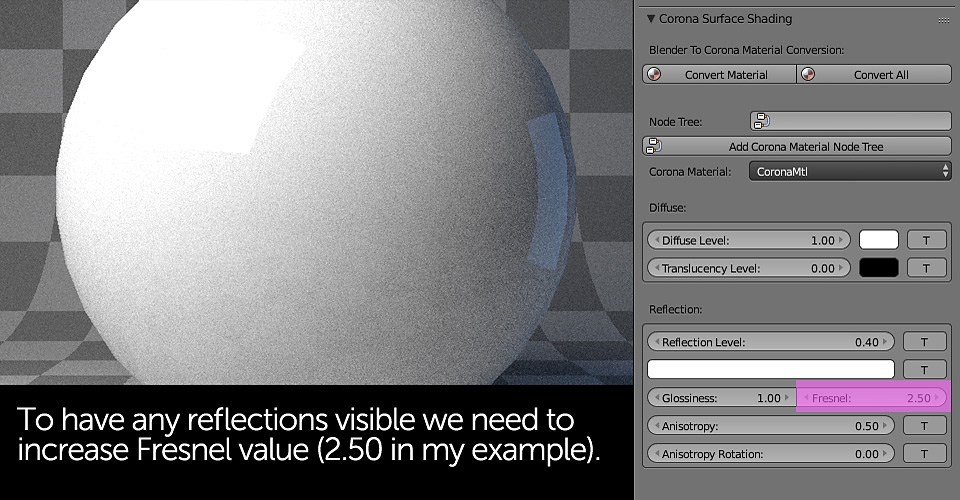
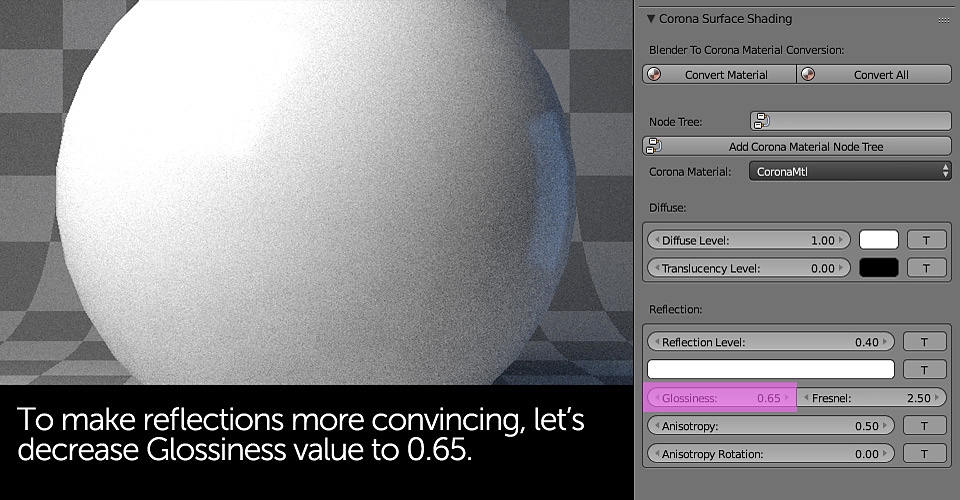
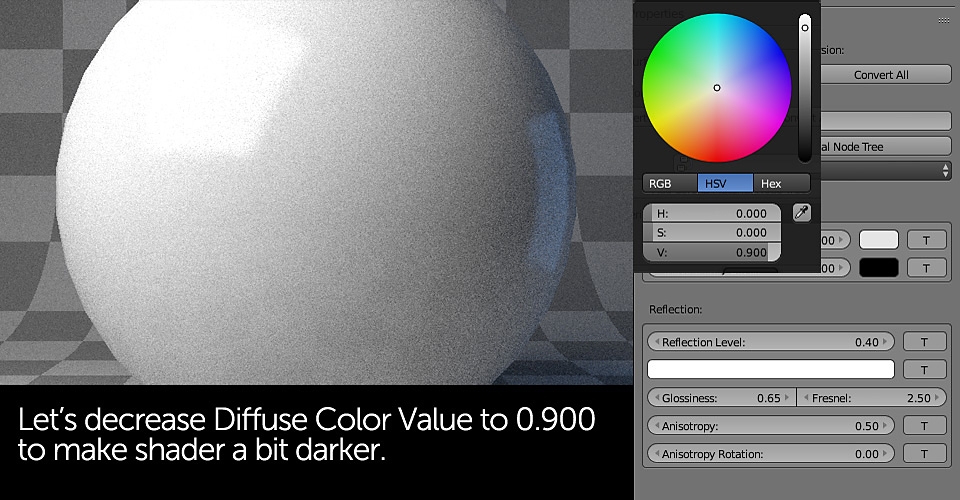
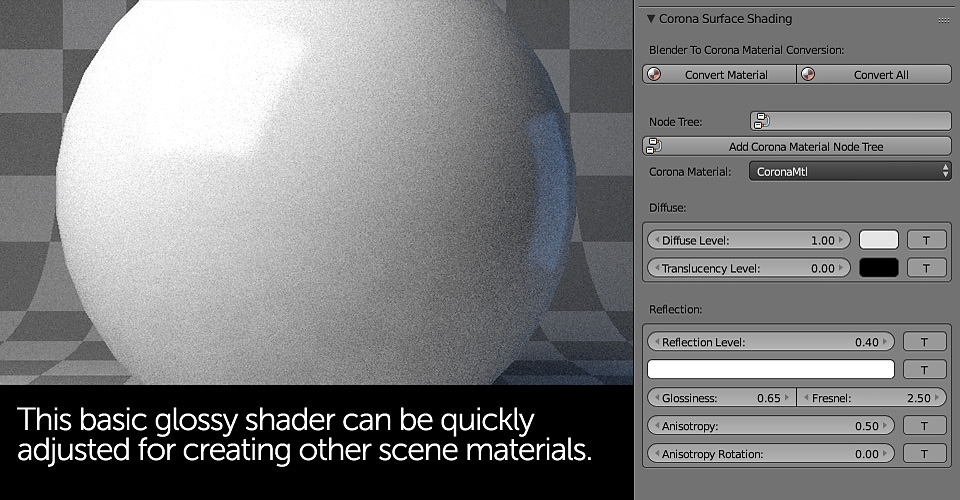
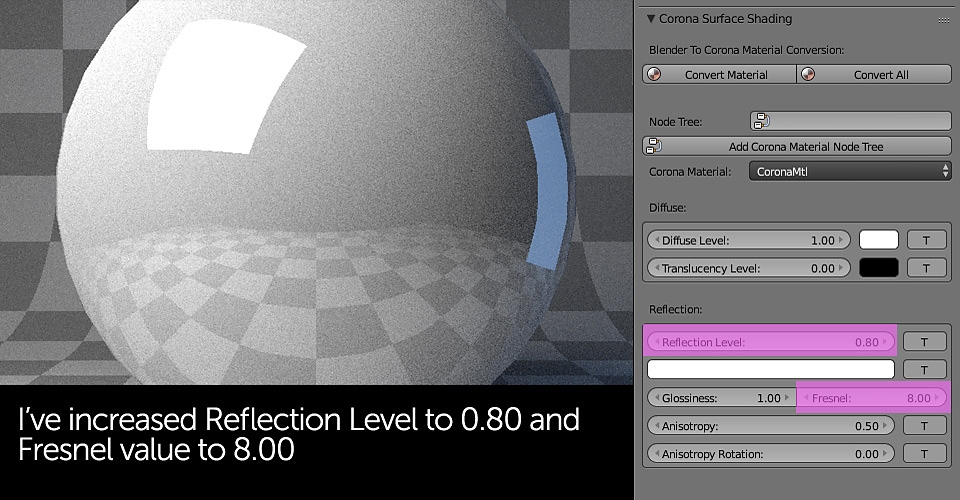
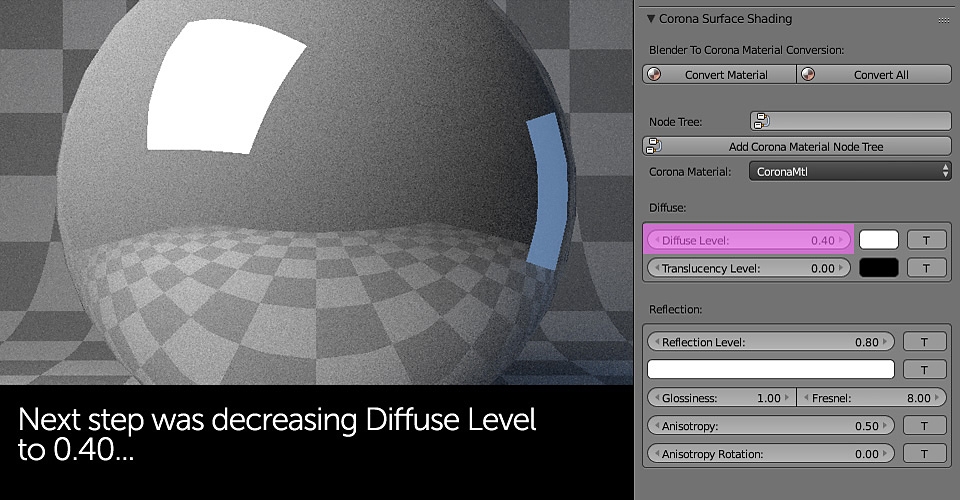
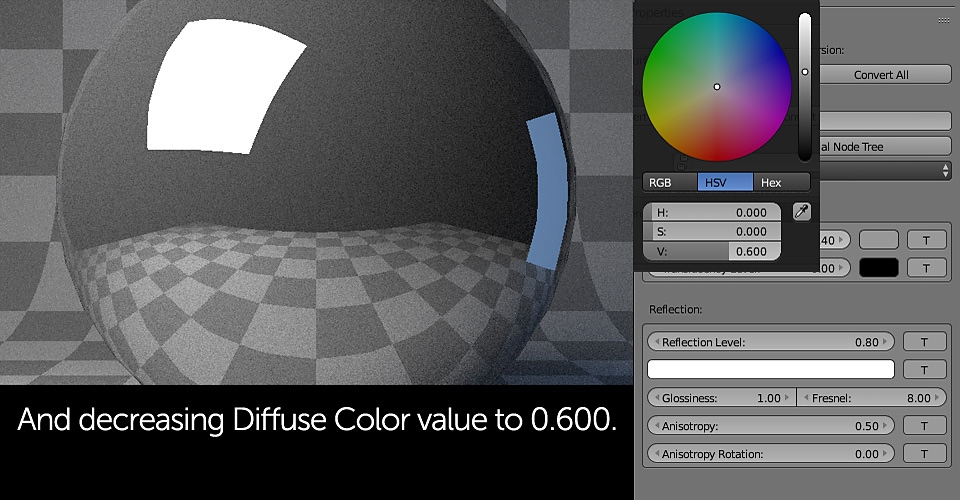
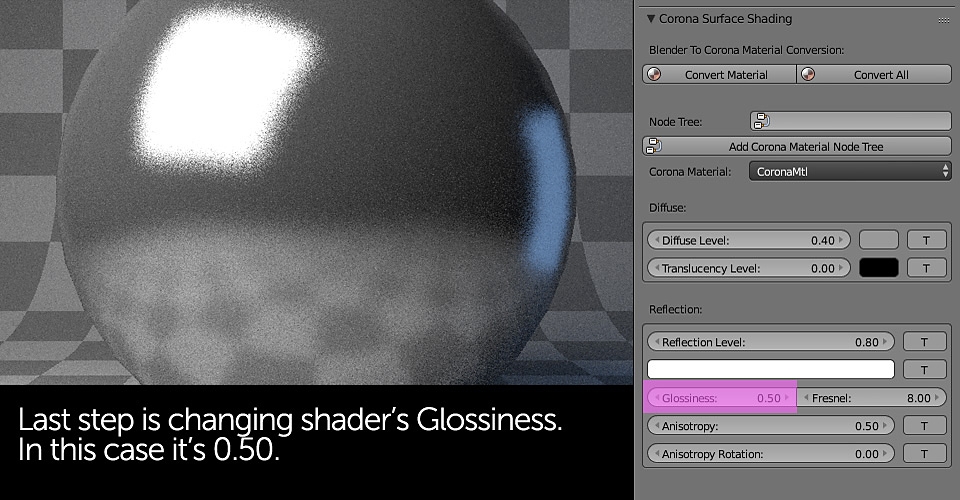
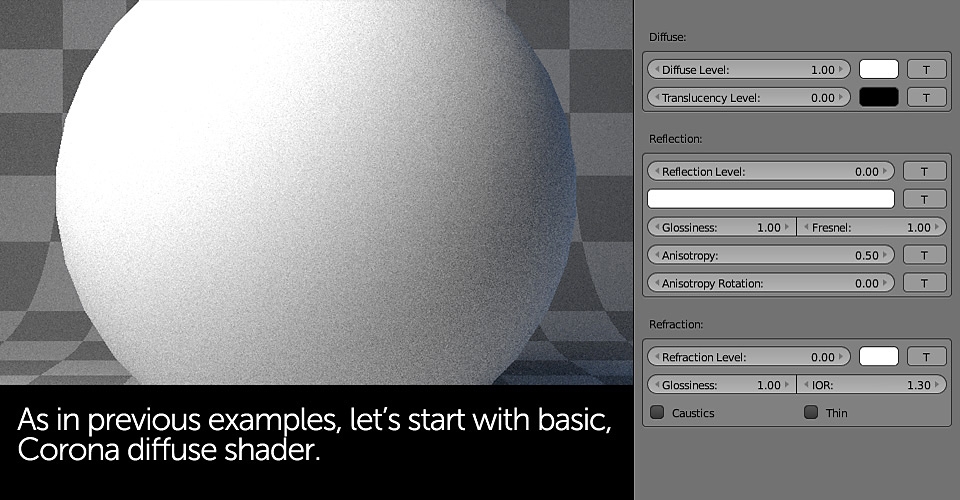
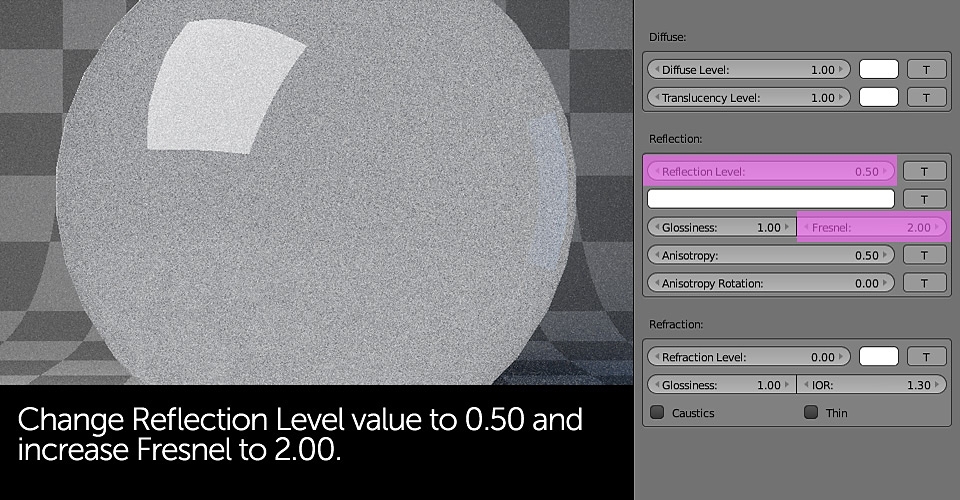
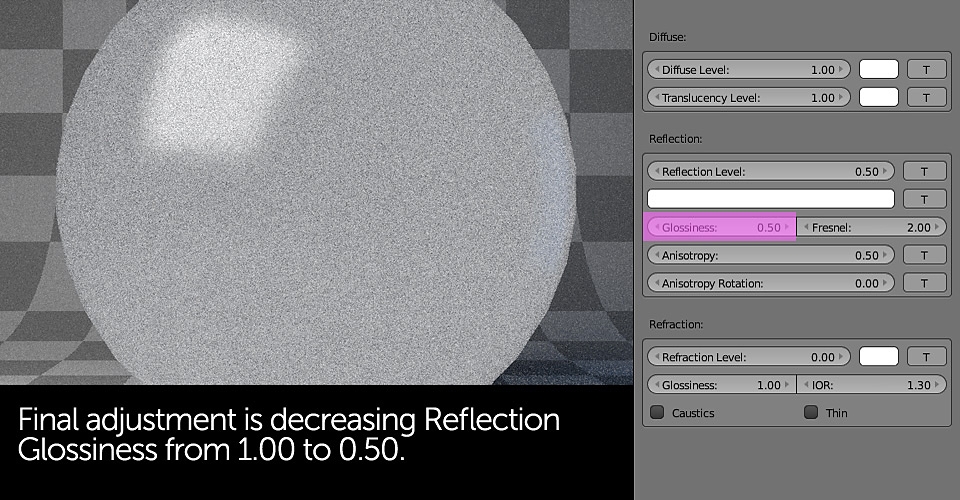
Plastic / Glossy shader can be used for re-creating basically all, non transparent or non metallic surfaces. This will be your probably most widely used shader as it's very easy to create and may be a good base for re-creating other materials like wooden parquet (after adding textures).
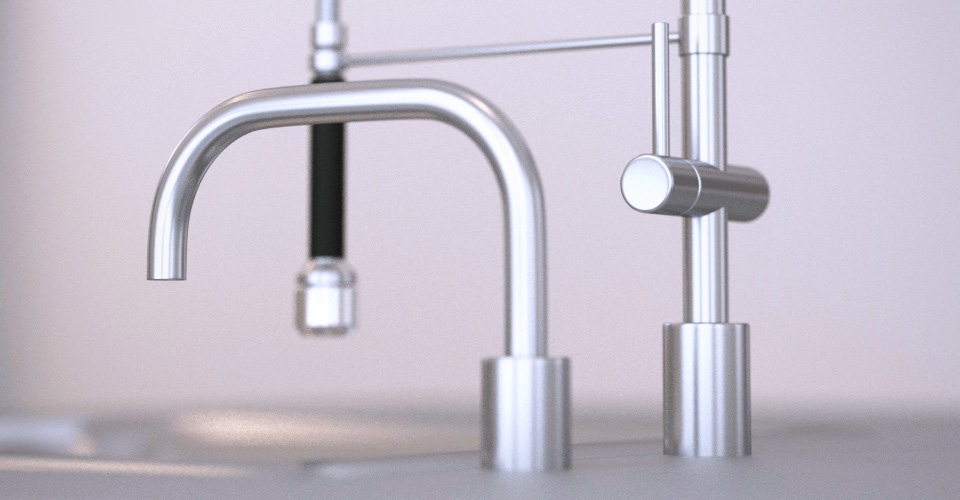
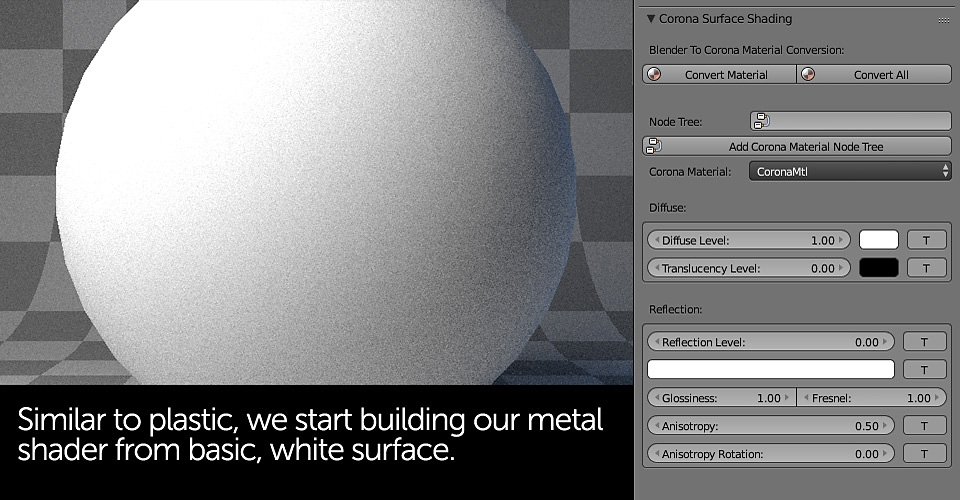
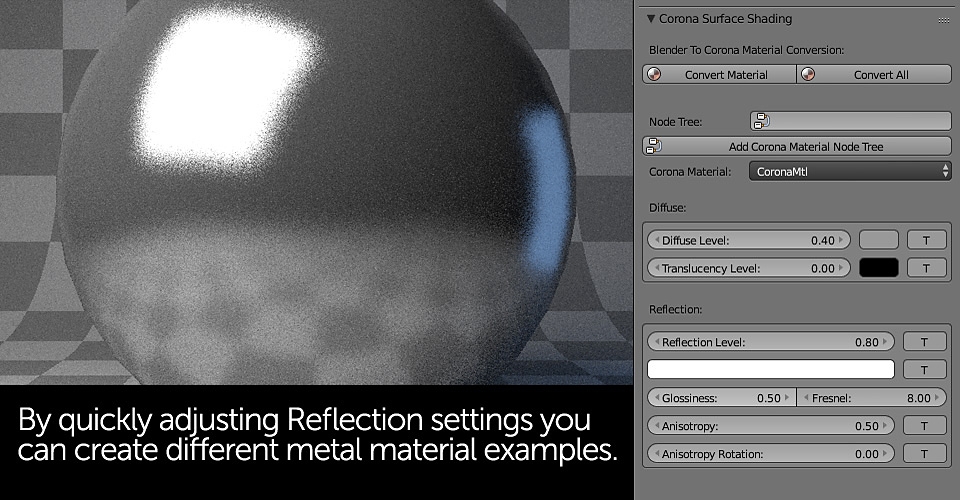
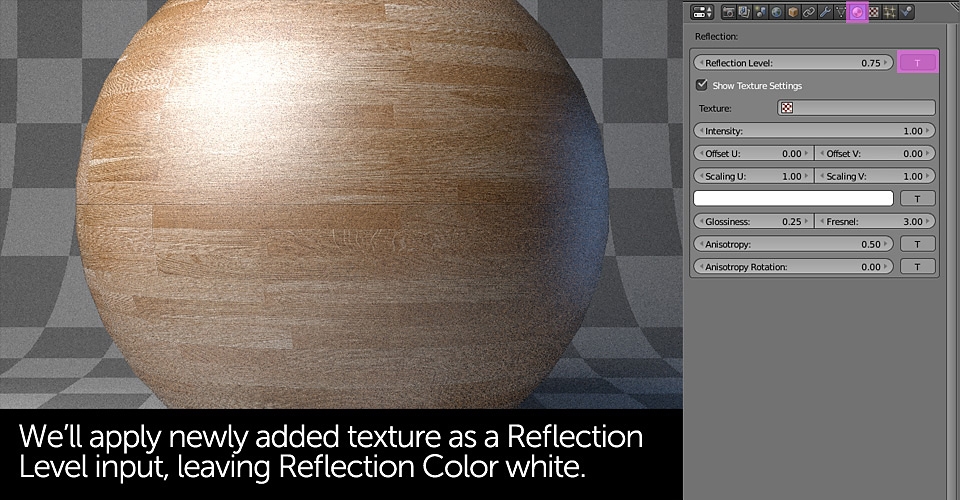
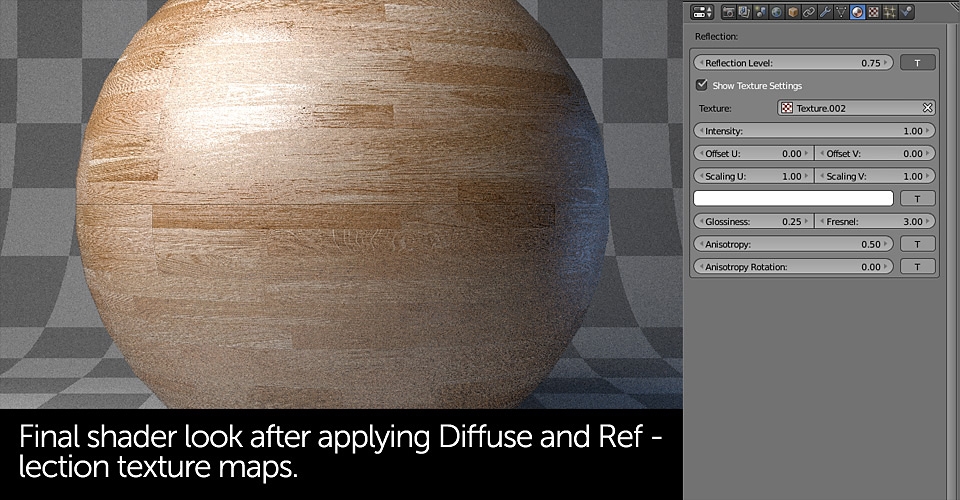
With this metallic "base" you can create different metal types by changing the Reflection and Diffuse colors. For making more complex metals like galvanized steel try using image texture in Diffuse color and Reflection Level slots only (leaving the Reflection Color white or bit grayish).
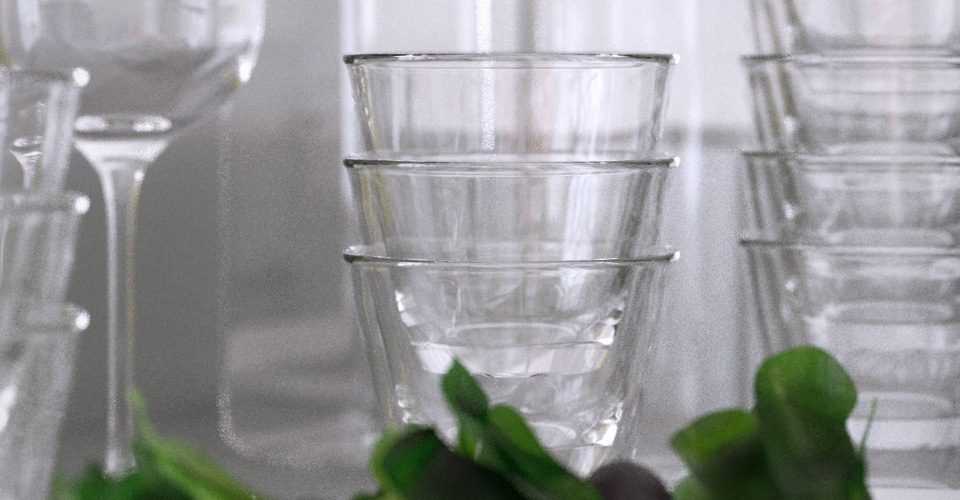
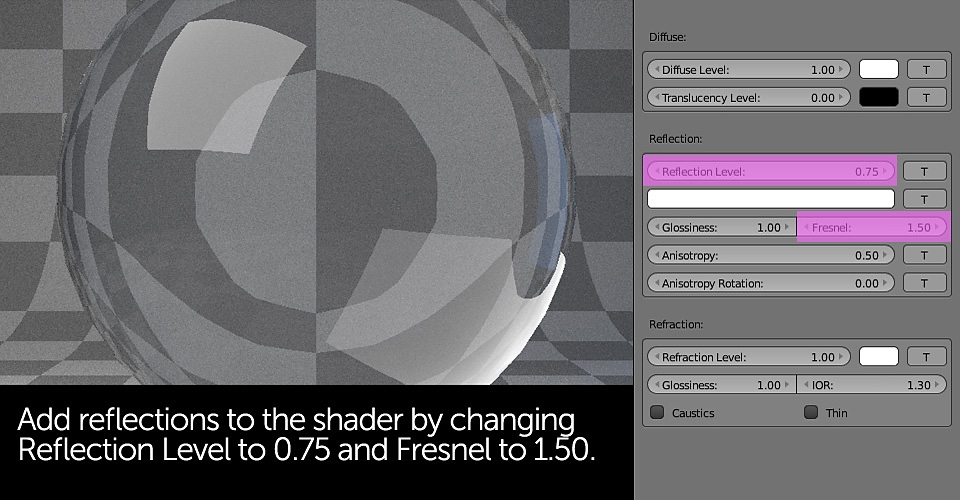
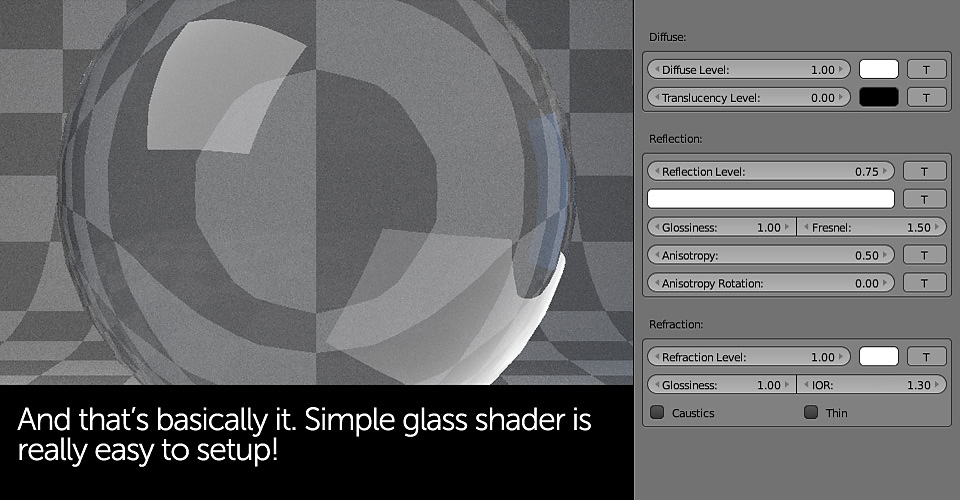
Glass shader in Corona is relatively easy to setup and looks very good without almost any adjustments. That's a big difference to Cycles or V-Ray where you always have to be a bit more careful with this type of materials. Just keep in mind that typical glass is not only transparent but reflective as well. If you're aiming for 100% realism, try enabling Caustics option. Unfortunately, this may significantly increase your render times.
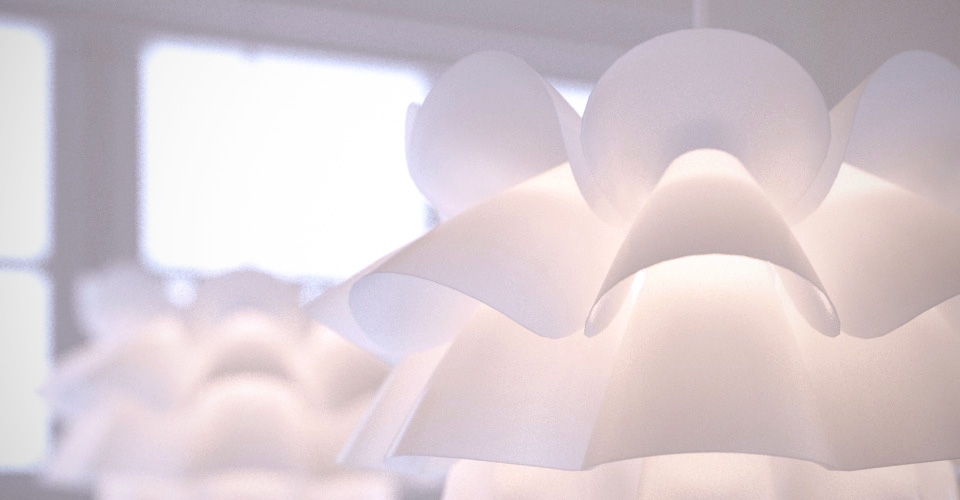
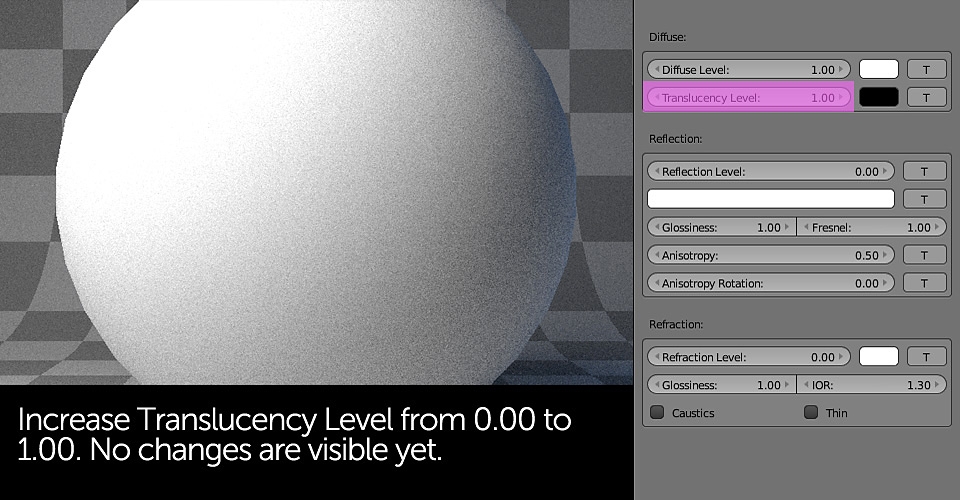
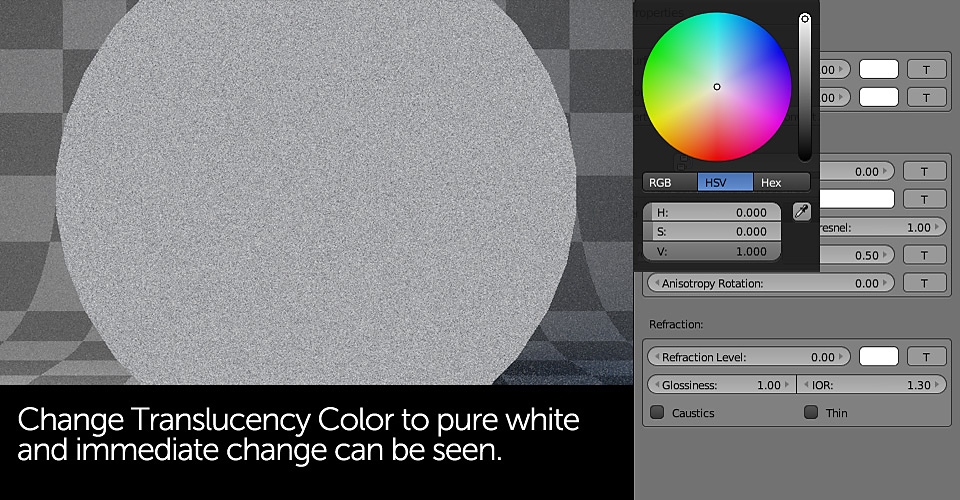
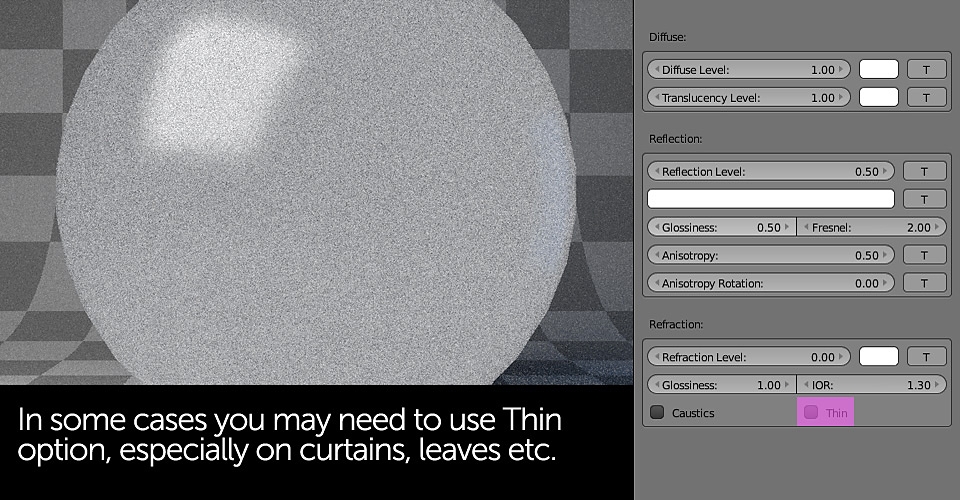
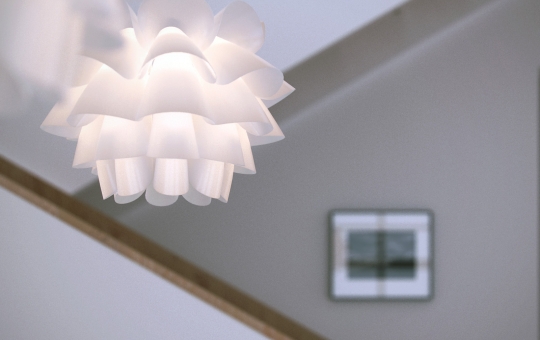
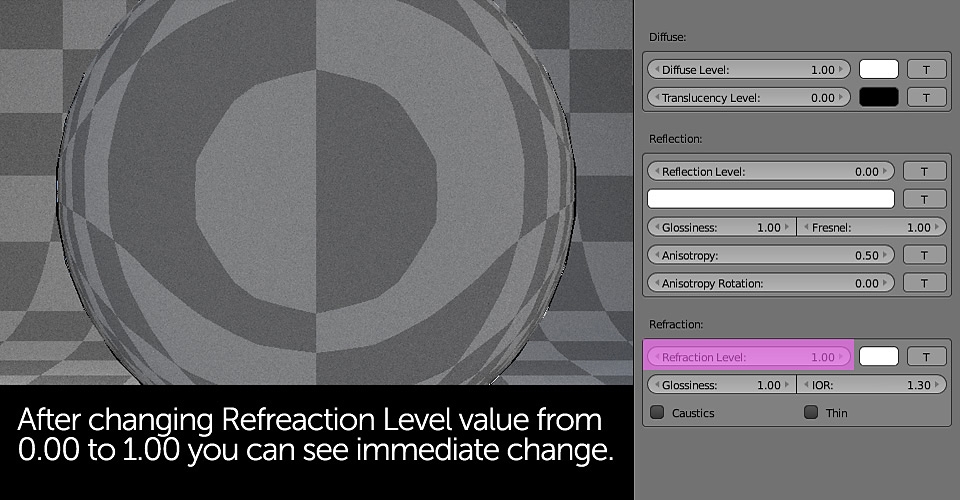
Corona translucent shader can be also considered relatively easy to setup - the key is proper balance between Translucency Level and Color. For creating semi-transparent white lamp elements in my scene I've just used pure, white color and maximum Translucency Level. Use this shader for re-creating other semi - transparent materials like window curtains, paper or leaves. Don't forget that some of these materials are reflective as well.
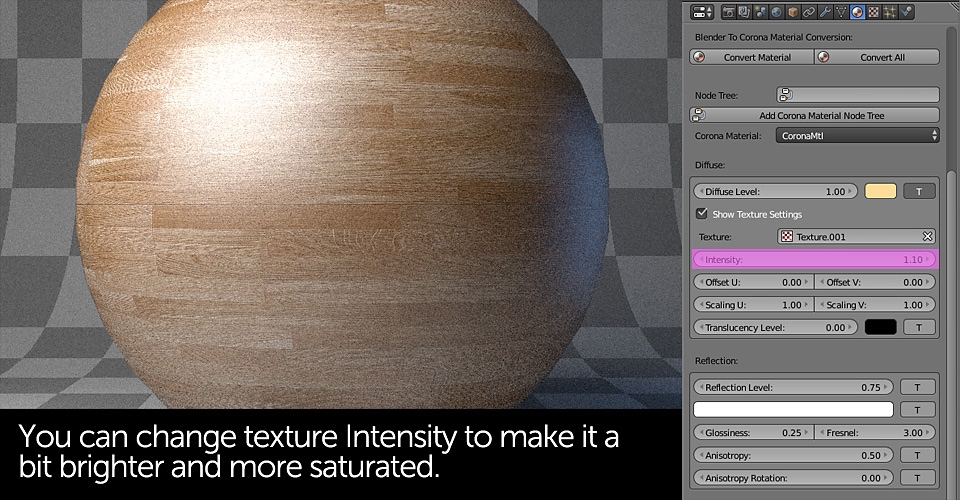
Corona handles texture maps a bit different to Cycles and all current early Exporter versions do not support Blender Texture Nodes. This means all texture map adjustments like color hue, saturation or value changes have to be handled in external, 2D application. This will probably change over time but so far it's the only way around.
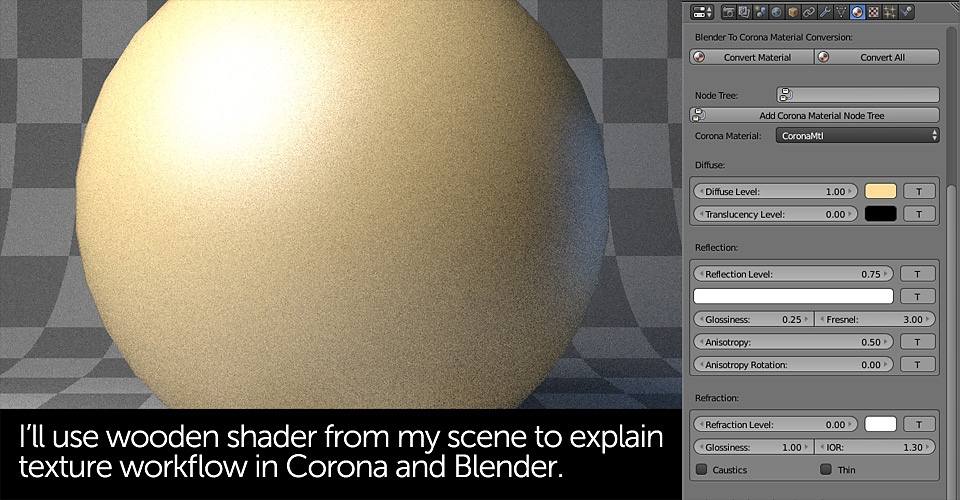
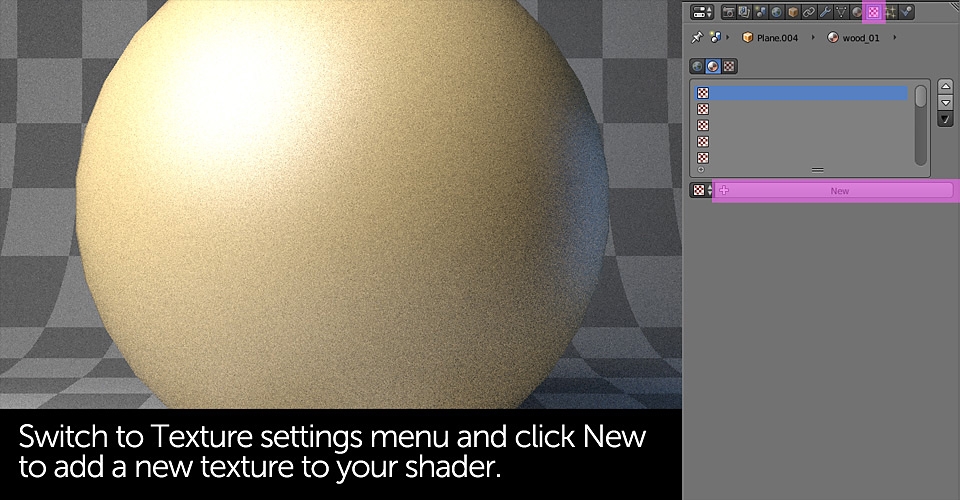
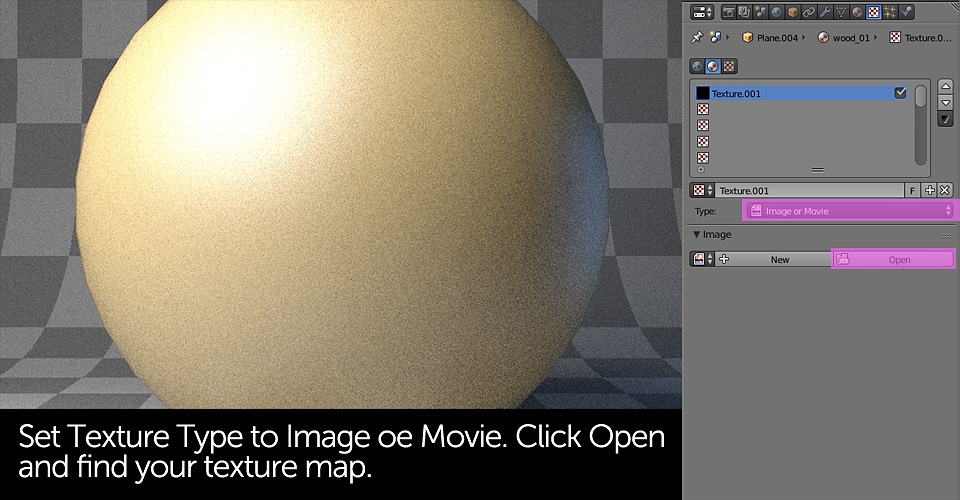
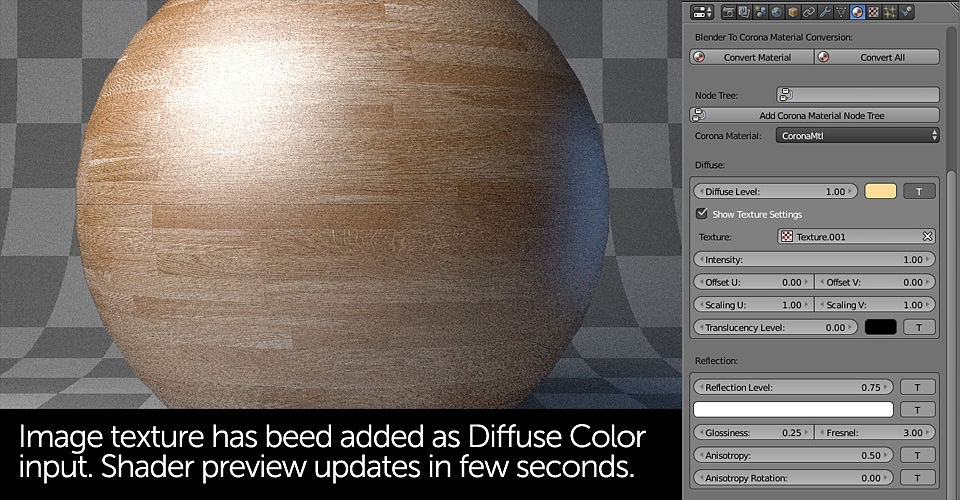
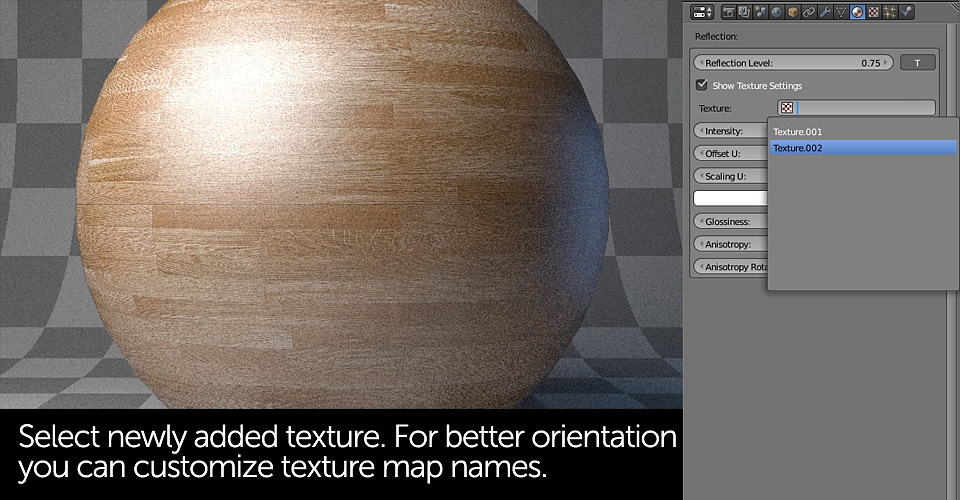
There is also a difference how you add textures to your shaders. If you've worked a lot with V-ray for Blender or Blender Internal rendering engine - everything stays the same. Cycles users should, follow the slideshow below that, describes the process (hopefully):
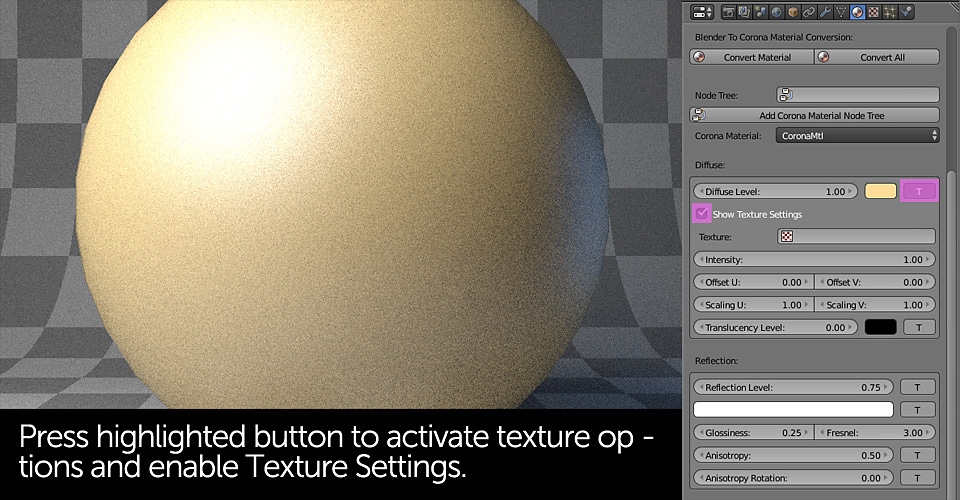


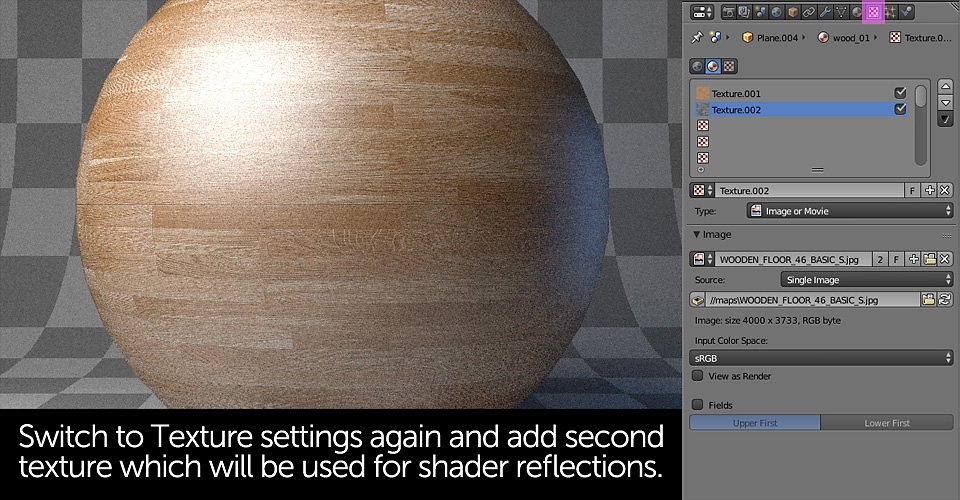
One thing worth mentioning here is that Corona uses Normal Maps for creating surface bumps. These textures have to be prepared either in external application or by using external plugins for your 2D software.
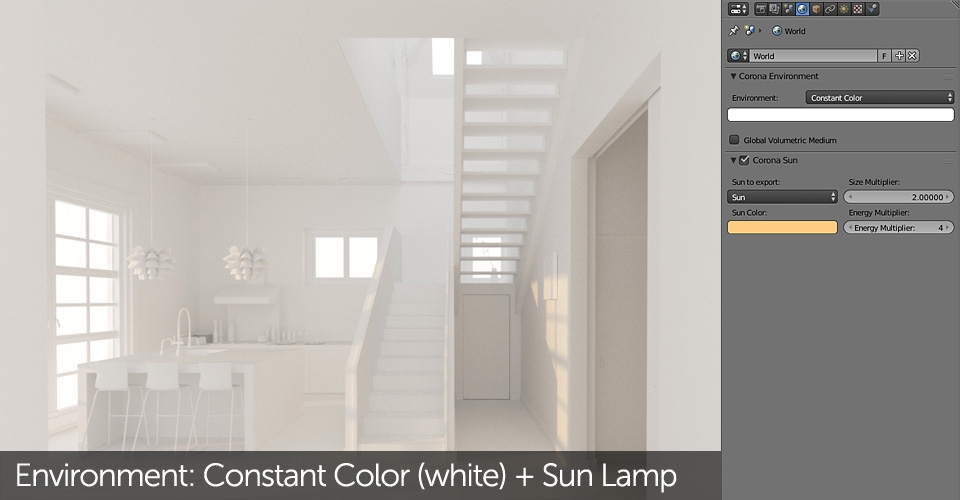
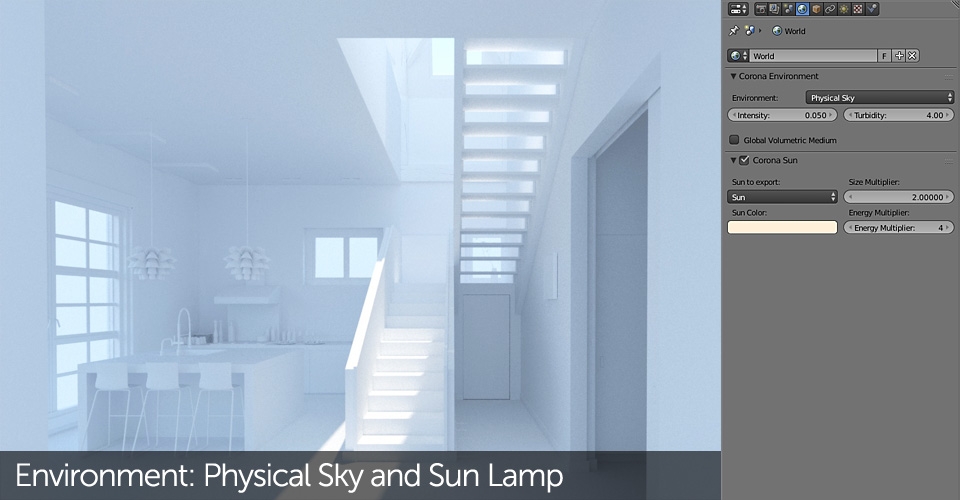
There are many different ways of illuminating the scene and probably the most common one is just adding some lamps. However, in Corona for Blender there's only one actual lamp being supported by the engine and that is the Sun Lamp. I won;t be covering it in detail but you can do your own tests as it's very intuitive and easy to setup.
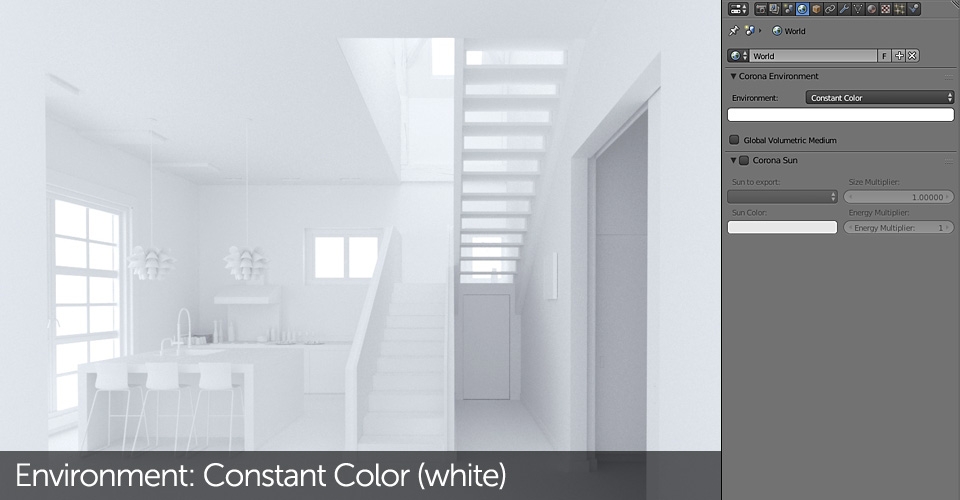
The method I've used for illuminating my scene was applying, simple white color as environment input. It was meant to be used just for testing purposes but since the result was nice I just left it this way. As most rendering engines, Corona supports HDRI images which next to few other methods can be also used for illuminating the scene.
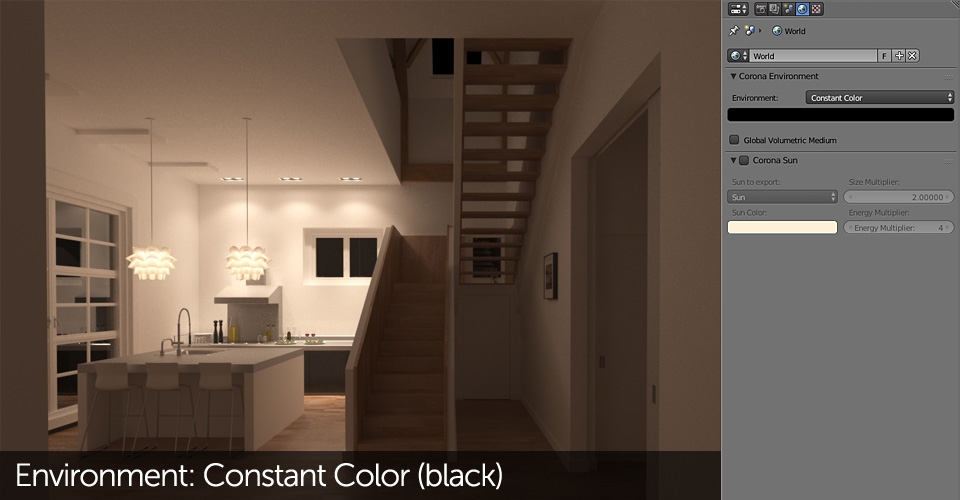
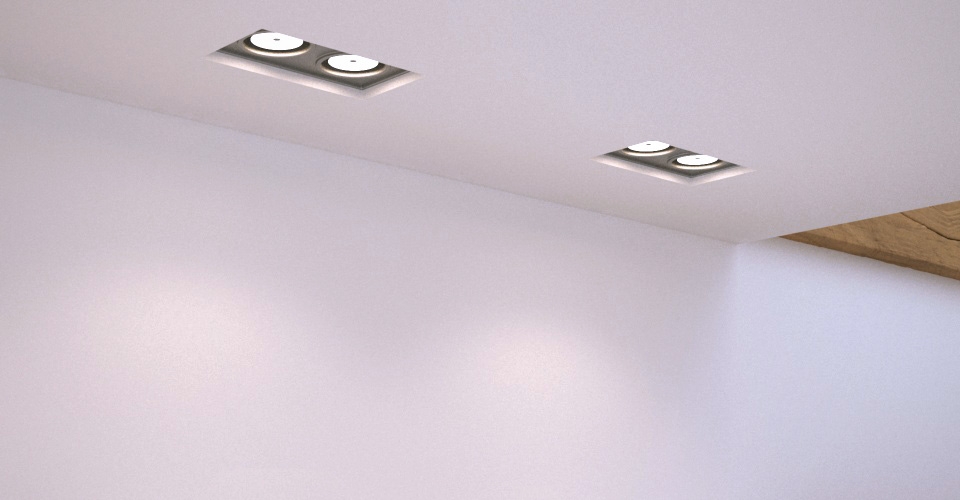
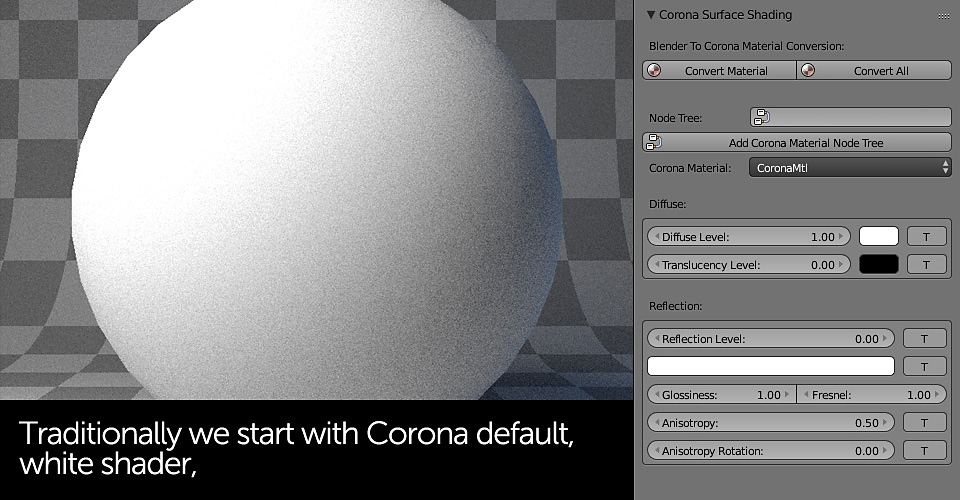
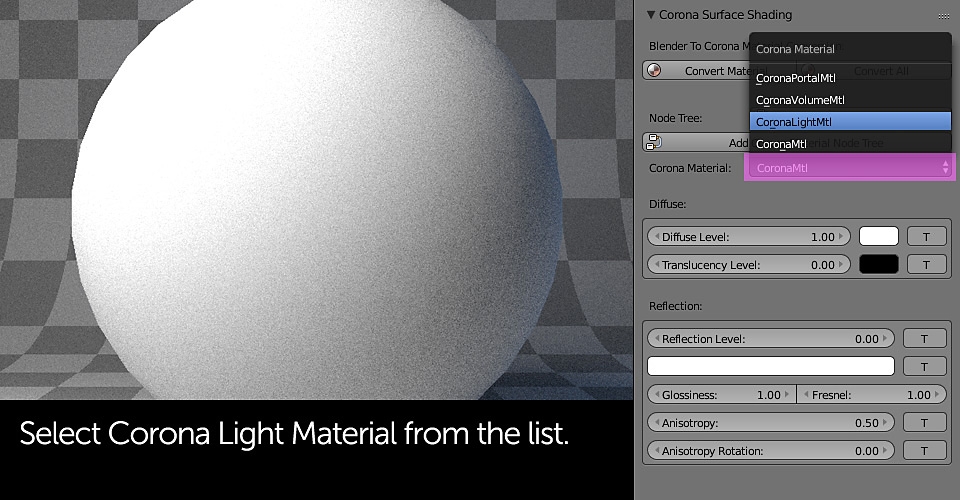
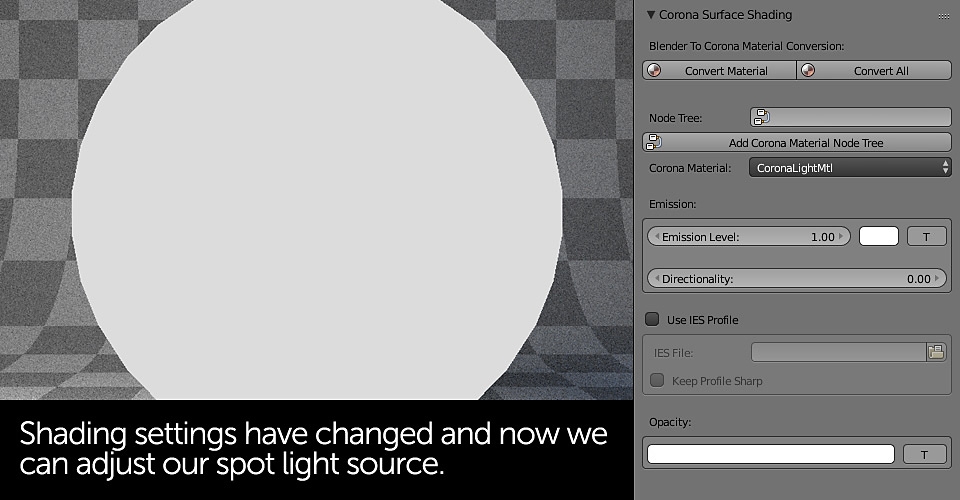
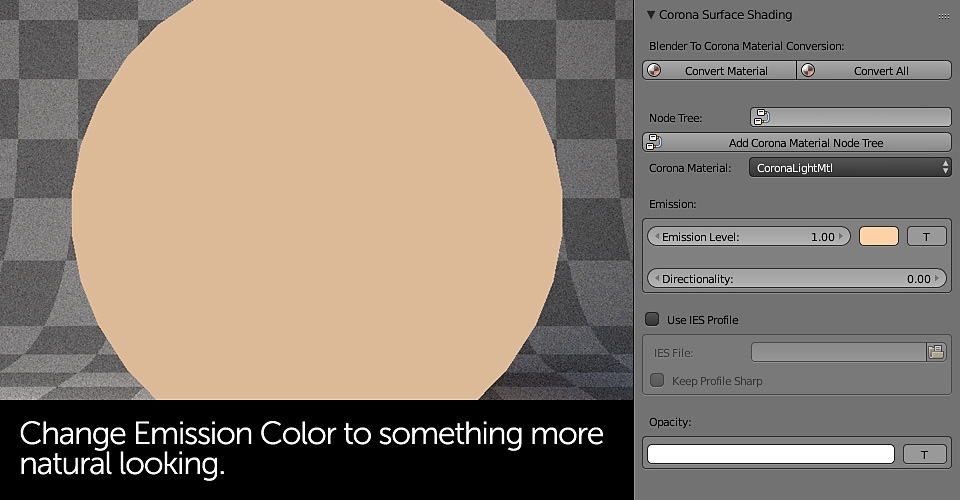
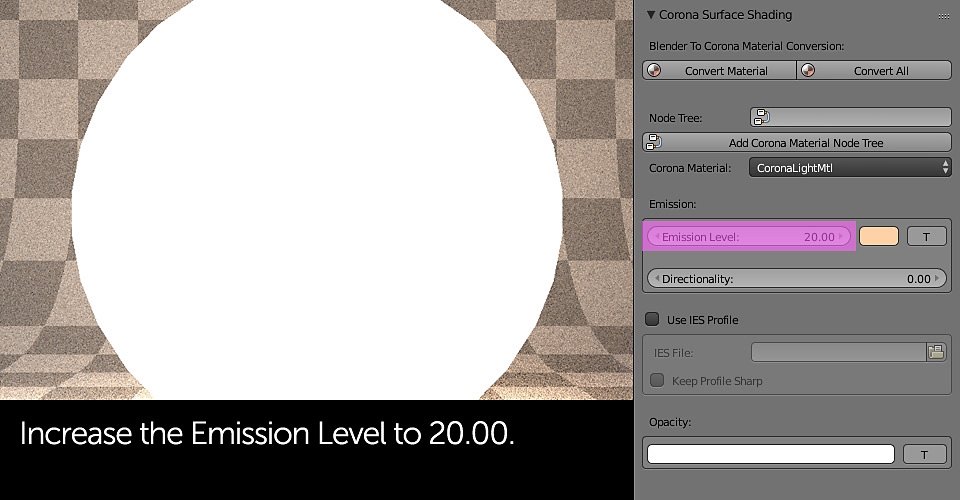
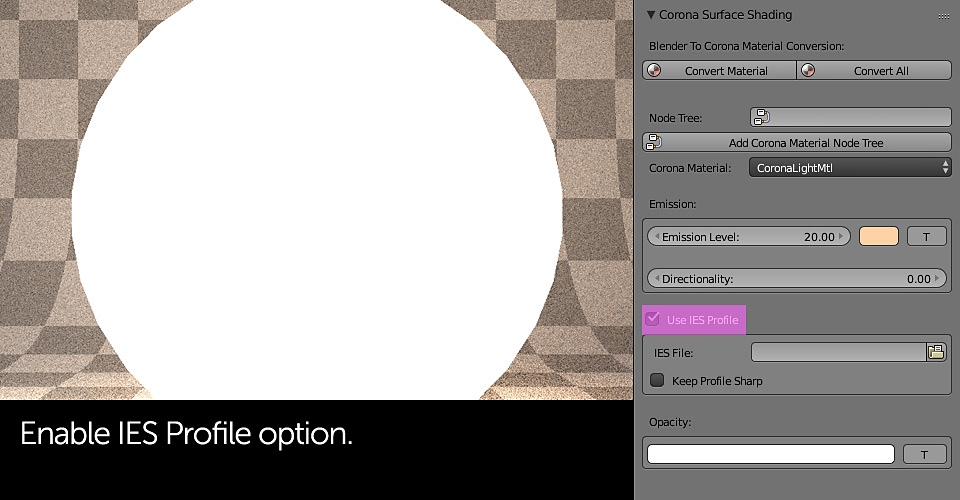
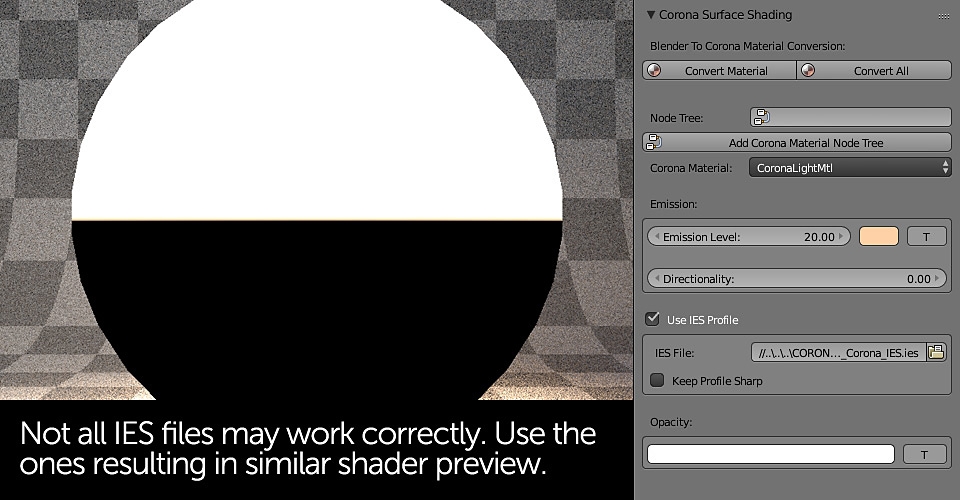
The other available light sources are lamps. Since Corona supports environmental sun only, the way to handle other light sources is applying Corona Light Materials to mesh objects. It's also possible to create directional spot lights using geometry meshes as they supports IES profiles. Please follow the slideshow below to learn how to do it:

Corona Light Materials can be also applied to mesh planes and used as "sky portal" area lights if put behind the window openings. Since my scene rendered fast in good quality anyway, I wasn't using this illumination method. However, for better optimization and fine tuning. I recommend doing your own research and tests.
That was the last "practical" part of the tutorial. If you're experienced Blender user I'm sure that from now on you'll be able to use Corona effectively and create much better pictures than shown in this tutorial. If you're new to Blender, depending on your skill you may need to get through the material once or twice but I;m also sure that sooner than later you'll "catch" everything up.
In the last part I'd like to summarize all the knowledge from the previous parts, do a quick comparison of most common rendering engines available for Blender and link all the download files once more.