We're in the middle of tutorial and by now you should be able to build your own furniture models with proper UV mapping. In this part I'll try explaining how to make your work even more alive by creating realistic looking shaders. Of course I won't be able to cover every aspect of this wide topic but I'll try explaining some of the cool tricks and techniques I use personally in everyday work.
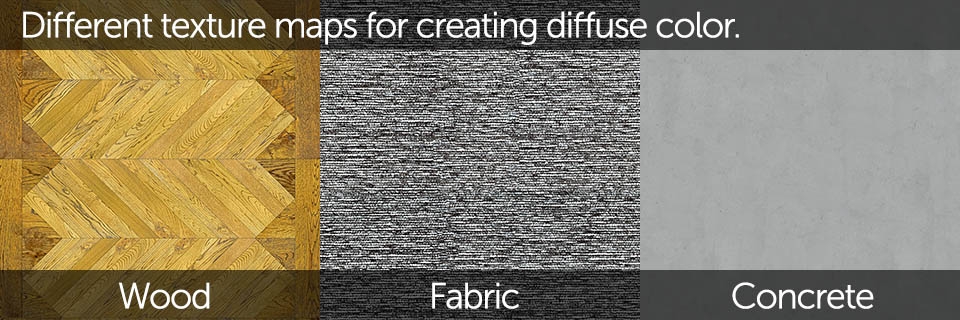
First of all, let's make a short clarification about the words we'll be using. What I understand as "material" is an existing, specific kind of surface that can be distinguished by it's color or reflectivity. This refers to real life objects and properties in general. "Shader" is CG version of real life material. It can have similar properties and can be freely adjusted by user. "Texture" or "texture map" is a bitmap file that we'll be using for creating our shader color, adjusting its reflectivity or bumping its surface.
I'll try showing you how to re-create most common material types such as glossy surfaces, glass or common metals. What I also find necessary is explaining the philosophy of shader building process in Cycles since It's a bit different than in other rendering engines on the market. With this knowledge I really hope you'd be able to do your own experiments and create realistic looking shaders.
When looking at any surface, your brain automatically interpreters it and correlates to what you already know and have experienced in life. For instance, you can spontaneously assign temperatures to different colors where red would represent something hot and blue being cold. You'd also think of concrete surface being rather matte while metal being shiny. It's helpful in everyday life as our brain doesn't have to analyze everything it sees, however it makes it more difficult to understand what you actually see when looking on a certain material. What's the actual color of chromed surface? What's the reflectivity difference comparing it to other metals? What's causing the surface imperfections - tiny bumps or material being more matte here and there? These are the questions you'd have to ask and know the answers when re-creating real life materials in any CG software.
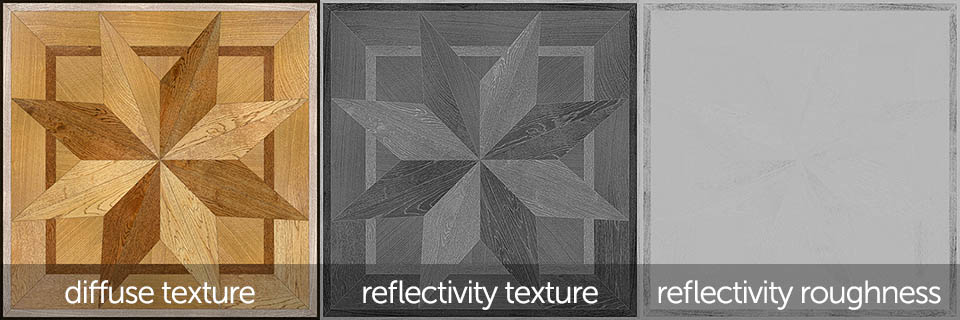
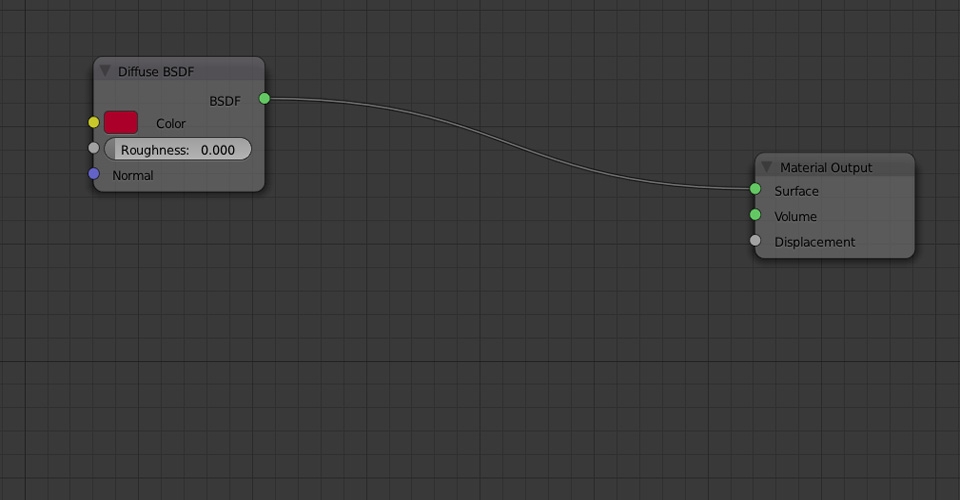
In CG world "diffuse" or "color" is a term for what we usually understand as a real "color" of the material or particular surface. It is also strongly correlated with mate, non reflective objects as they seem to look neutral no matter of the surrounding environment. We can easily distinguish the color of orange fruit, having more problems describing shiny metal. However, keep in mind that in real life, all surfaces are reflective and purely "diffuse" materials don't exist.
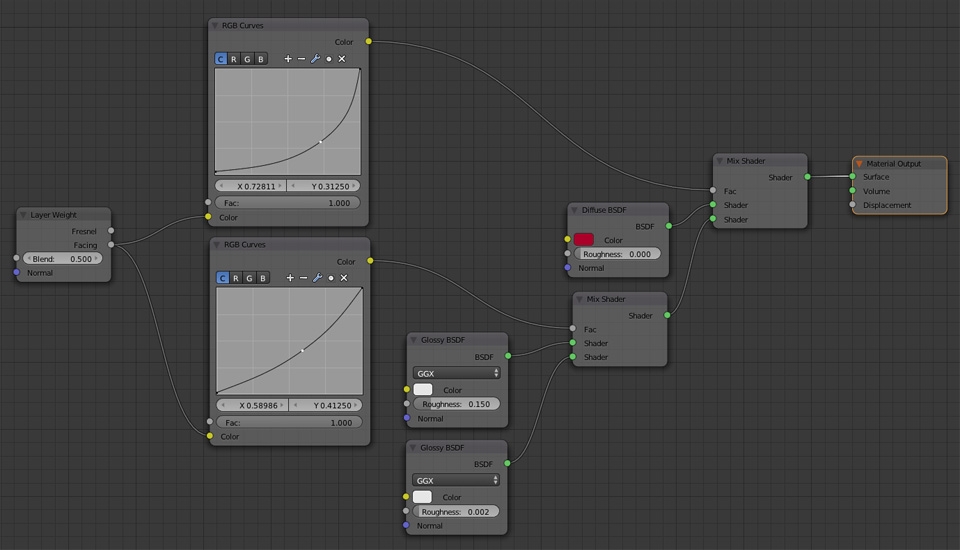
I think reflectivity is the most important factor if you wan your shaders and models look nice and realistic. As mentioned earlier, in real life each material is reflecting the environment in more or less noticeable way. Different materials vary according to their "diffuse" color or texture and they can also have different reflectivity. In CG world this attribute is controlled in various ways and I'll explain it more closely in practical examples later on.
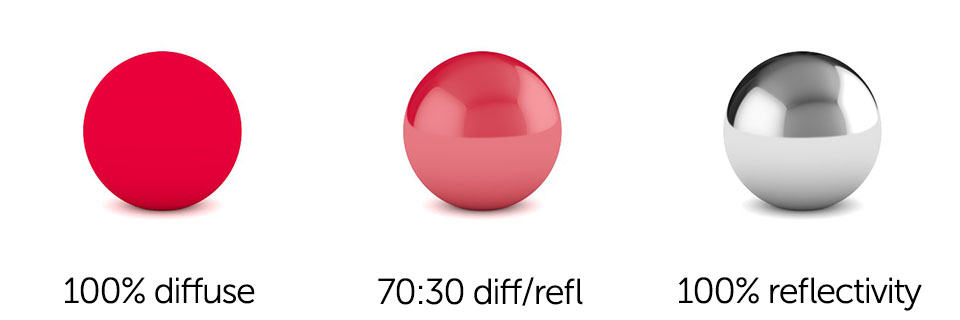
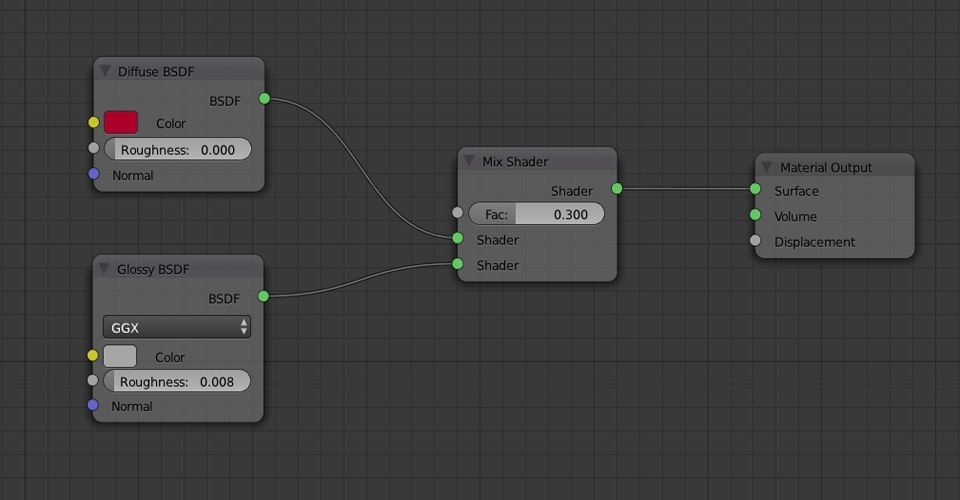


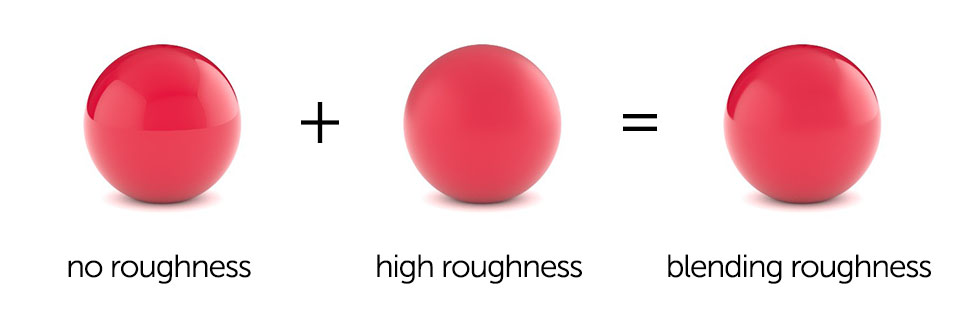
As you can see above, creating a basic, reflective shader comes just from mixing two different material properties in the desired proportions. However, materials like this don't exist in real life as the reflectivity always differs depending on the viewing angle. This is the most important factor very often omitted by inexperienced 3D artists.
Depending on the software, there are different ways of controlling reflectivity angle effect but let's first try to fully understand what is it all about. Make your own observations in real life - try grabbing some objects around and look at them from different angles. You should notice how the reflections change when looking at the surface directly straight and then going closer and closer to zero degree.


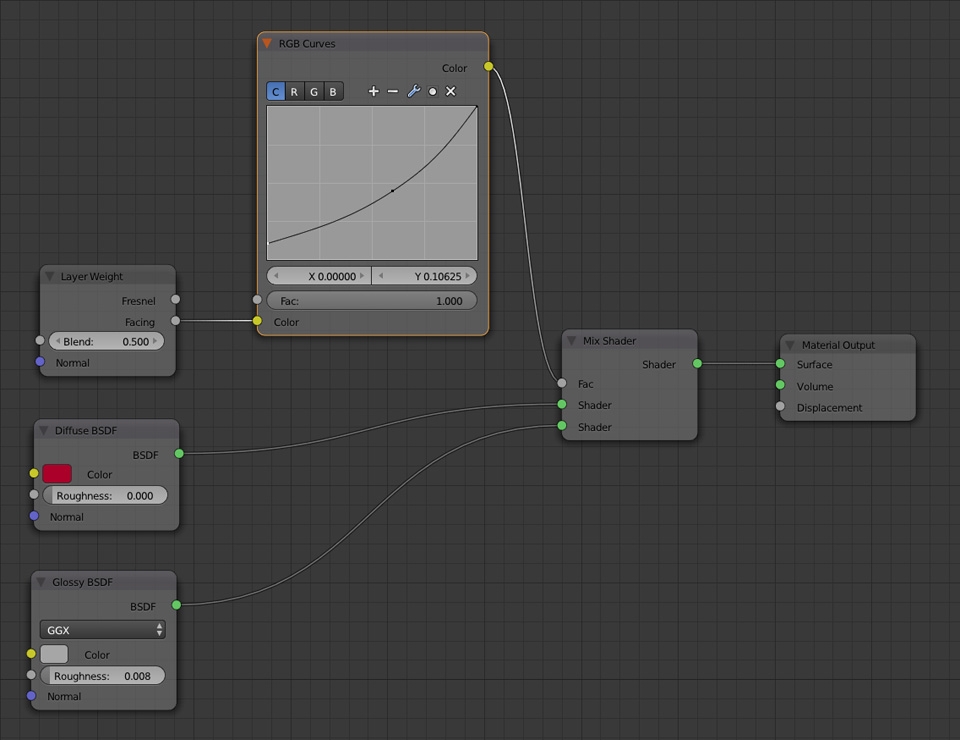
In the example above, reflections are dependent to the surface curvature. Building your shaders this way gives much more convincing and realistic results. What you can also observe is not only the reflectivity change depending on the surface / viewing angle (best visible on the left and middle models). It is also the general reflectivity of the shader being changed. Still there are more reflections visible on the edges, however on the right example the center part of geometry gets more reflective as well.
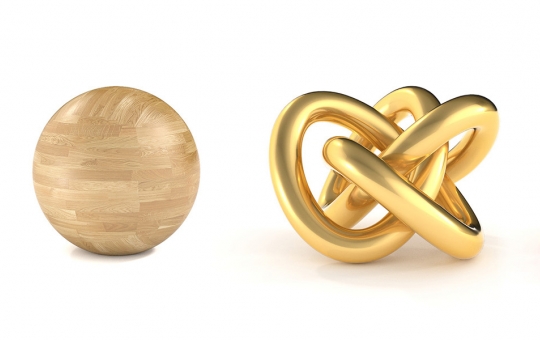
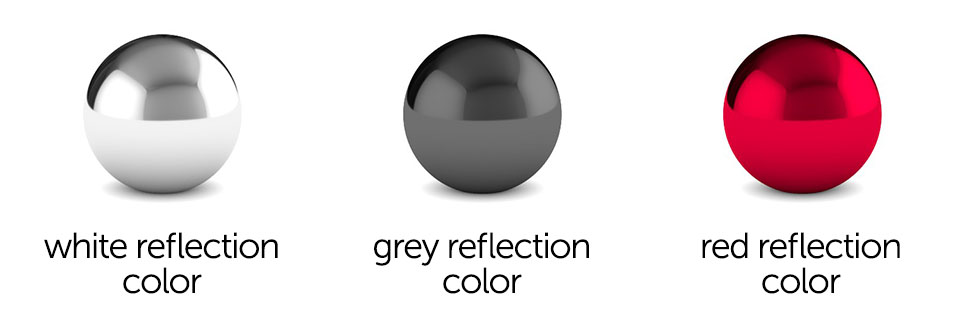
It is also worth mentioning that reflections can have different colors. For most non metallic surfaces the color will always vary from white to dark grey. Metals such as gold or brass will have tinted reflections in the middle section, becoming purely white on the edges and low angles. In the examples below, shader is 100% reflective even if the color tint makes it look a bit like diffuse + reflectivity mix.
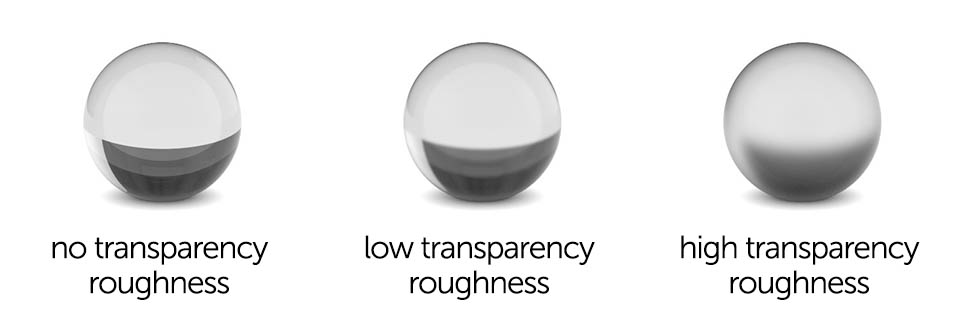
Shading roughness (also called glossiness or hardness) can refer both to the diffuse, reflection or transparency properties. By changing this attribute we can make our reflections more blurry, glass shaders more "foggy" and diffuse surfaces more light absorbing. Same as with reflections, glossiness also changes depending on the viewing angle, however not for purely diffuse or glass shaders.
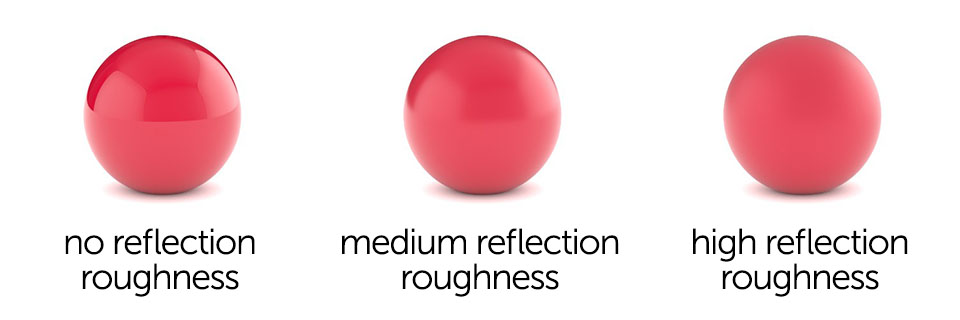


The above example shows shader with the same reflectivity value (more reflections on the edges but same amount in the middle) with three, different roughness settings. At this stage reflections are blurred evenly no matter on the viewing angle. Please note that right example looks definitely matte but is something totally different than clean, diffuse shader we've discussed earlier.
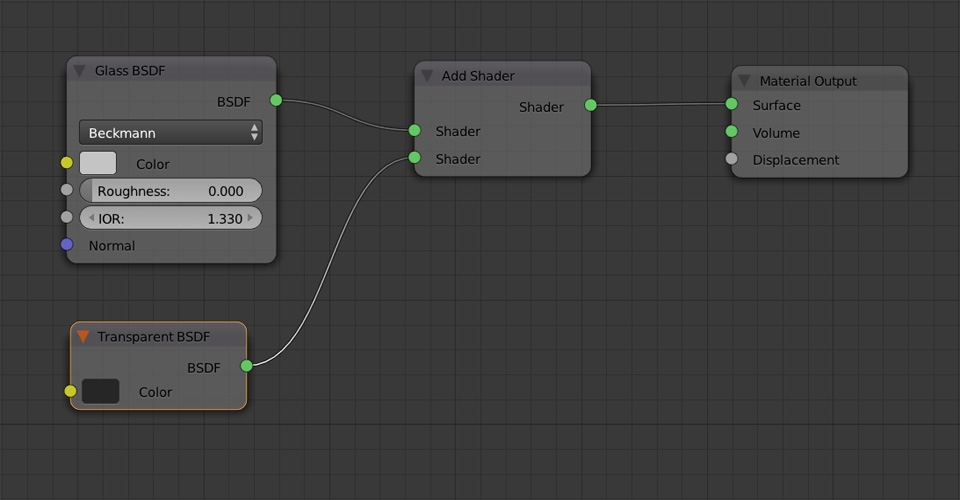
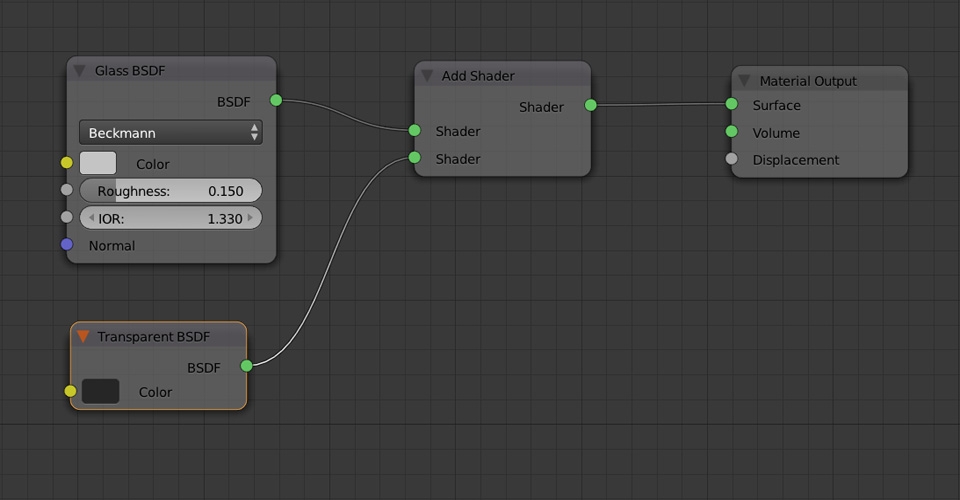
Roughness / glossiness does not always referrer to reflections only. You can use this parameter to re-create blurry or "foggy" glass materials as you see in the picture above. For diffuse shaders, roughness allows you to increase the amount of light being absorbed by the surface.

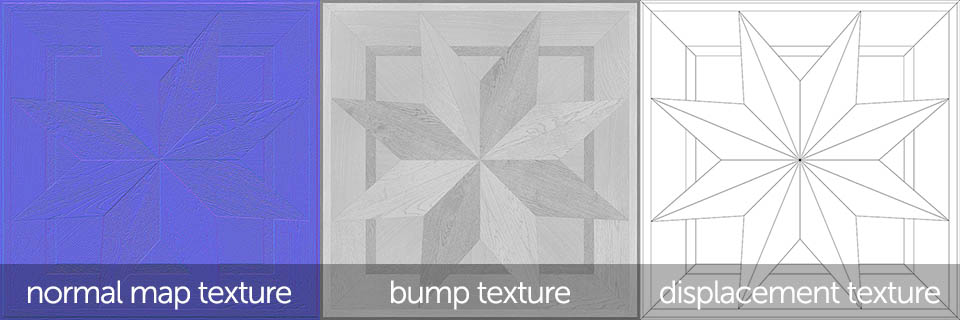
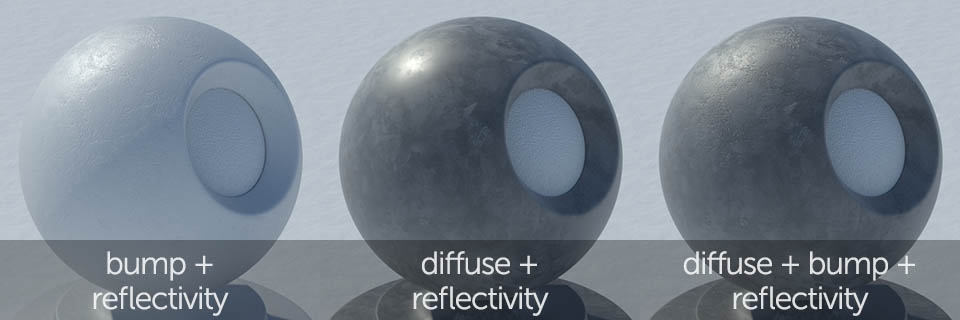
Bump and Displacement factors are used for adding physical imperfections to your shaders like cracks, scratches, tile fugues, joints. Sometimes it is necessary and easier to add details like this by simply modeling them or sculpting onto the surface. However, properly created displacement textures can also make miracles.
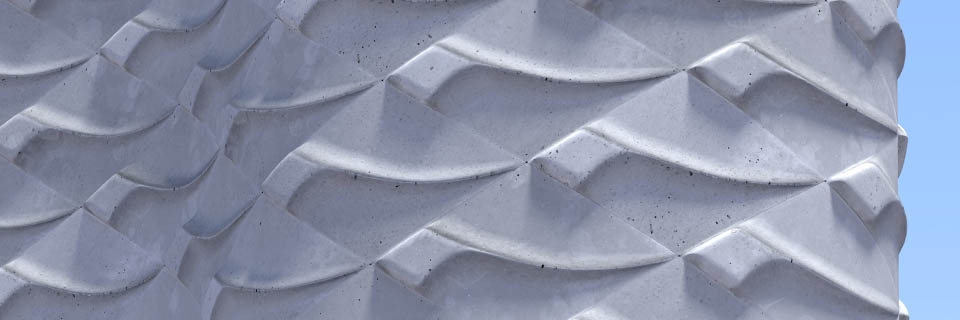
For creating bump effect you always need either image based texture or procedural one like noise for instance. A common mistake with using bump is setting its value too high and mixing it up with the reflection roughness as this can be also simulated using image texture. What I do personally is setting my shader's reflectivity first and then adding surface bumps. They should simulate only minor physical imperfections like scratches or small cracks. For "deeper" and more distinct surface details I suggest using displacement textures.
Besides bump and displacement, we can also use "normal maps" however I'm not a big fan of these for several reasons. First of all, the final effect is only slightly better to regular bump and still very far from using displacement. Second, to create normal maps we either need to generate them in external software or use some additional plugins which takes time (and I'm quite a lazy person). Third, normal maps look totally different to reflection, roughness or bump textures which you'll be using regularly for building your shaders. All of these use only black and white values which can be mixed together for achieving different results - normal map uses colors which eliminates it from any other use than generating surface bump. Last but not least - normal maps aren't so easily adaptable to different rendering engines, giving different results depending on used gamma settings for example. This makes work even more troublesome if you'd like to quickly adapt and test your 3D models or scenes in other applications. However, if you're looking forward to creating detailed real-time animations or game engine models, you'll have to know how to properly handle normal maps.