After creating our first, real 3D scene by the end of the previous chapter, we will now dive deeper into the Edit Mode. In this part of the Course, we will learn some new tools available in the Edit Mode only. By getting comfortable with these tools, you will be ready to actually start creating 3D models completely by yourself!
At the end of this Chapter, we'll create another small 3D project in Blender to revise everything we've learned. The tools we'll learn to use here are used by intermediate and advance Blender users on day to day basis. Let's now jump into it!

10/01/2019 News
Chapter 03: Edit Mode
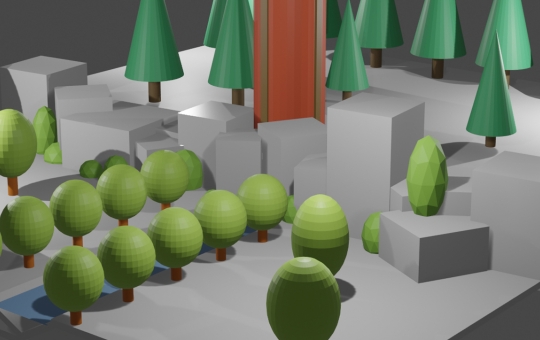
In this chapter we'll be exploring the Edit Mode, creating a bit more advanced 3D models step by step, ending with the cartoon stylised scene which we will render in Eevee.
Selecting mesh elements in Edit Mode may be quite tricky sometimes, that's why Blender is equipped with some extra tools to help us in the daily work. In the video below I'll be covering the Edge Loop and Edge Ring selection methods, together with a few other tips and tricks you could use in Blender 2.80!
● Alt + Left Click → Selects Edge Loop
● Alt + Ctrl + Left Click → Selects Edge Ring
● Ctrl + Num Plus Key → Increase Selection in Edit Mode
● Ctrl + Num Minus Key → Decrease Selection in Edit Mode
● L Key → Selects linked meshes in Edit Mode
As you know from one of the previous videos (actually from the Video 12 of the Course), keeping multiple Meshes in a single Object is a quite useful way of having things organized in the 3D scene. Knowing how to quickly select different Mesh elements, makes that technique even more practical!
You already know a few ways of creating new geometry in Edit Mode. Apart from the Extrude and Fill tools, there are another, two very powerful techniques which we will learn now. Loop Cut Tool well become your bread and butter when creating your own 3D models and the Bevel Tool will be a great addition to that! Let's now jump into the videos and see how it all works!
● Ctrl + R → Activate the Loop Cut Tool in Edit Mode
● Ctrl + B → Activate the Bevel Tool in Edit Mode
The reason I'm introducing the Loop Cut and Bevel Tools together is that they both allow us creating additional Mesh elements around the Object's Edges. In the slide comparison below you can see the way Objects work with Smooth Shading applied, depending on the Mesh structure they're having. We'll learn more about that in the next video!
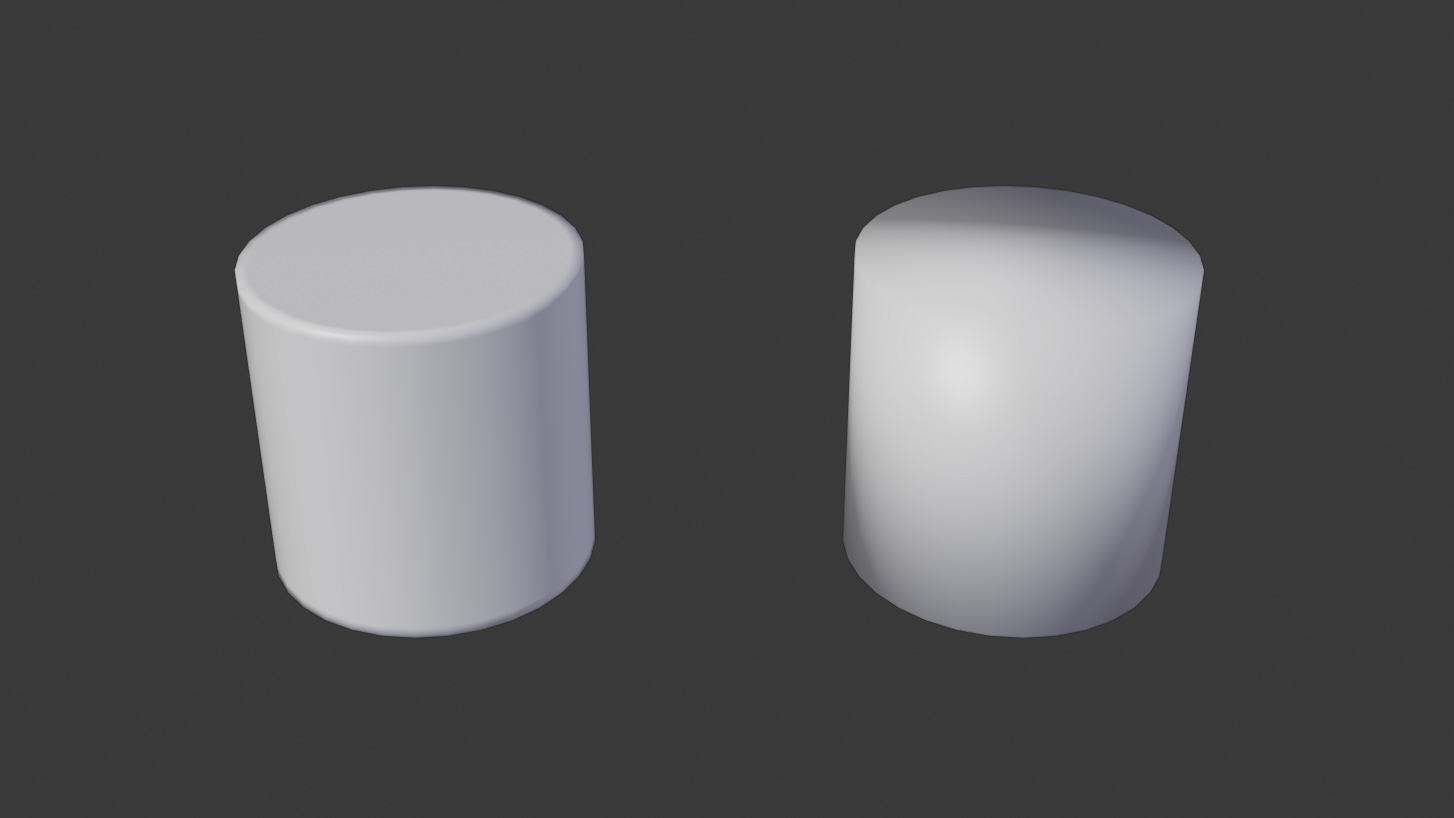
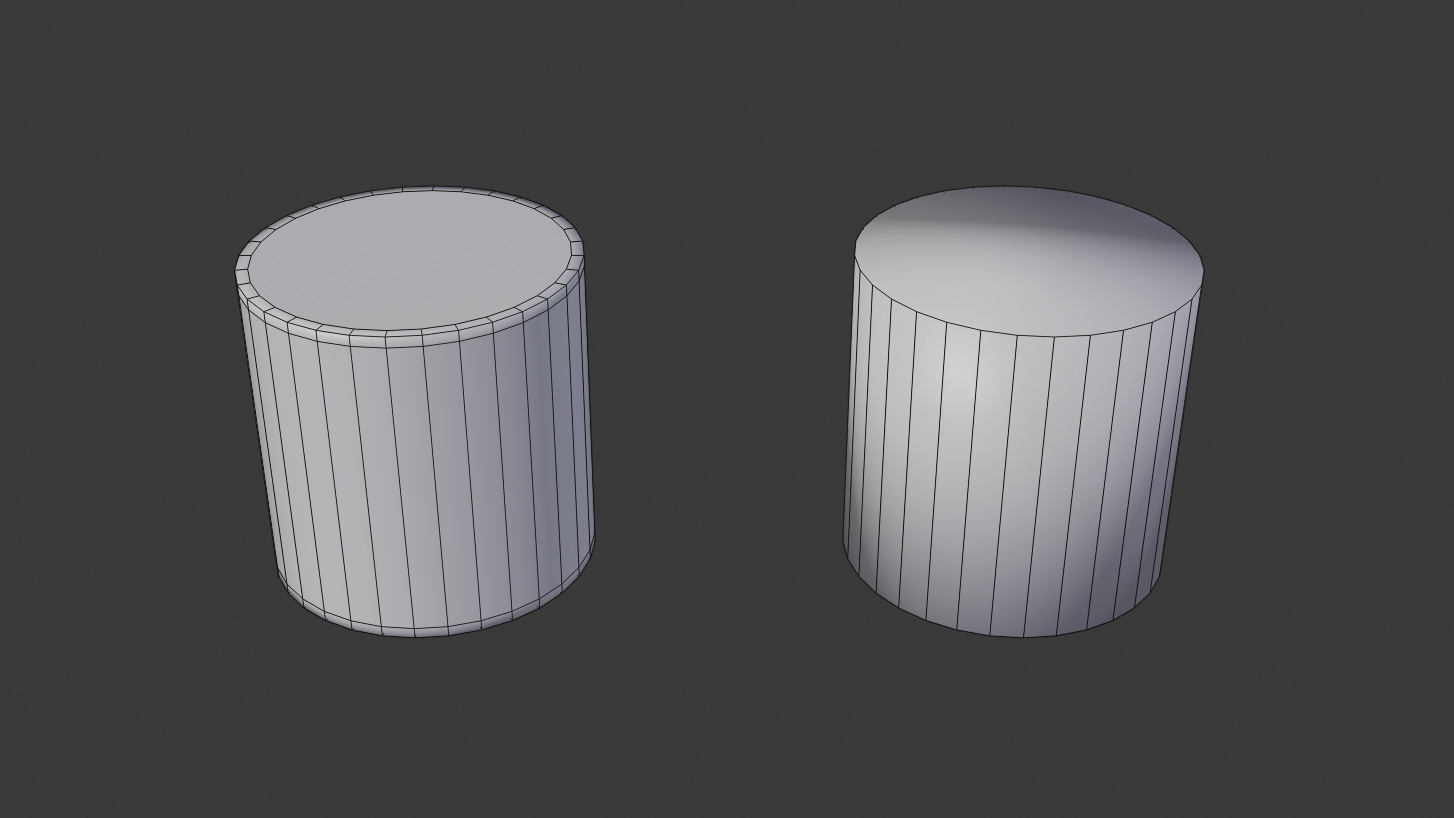
Smooth Shading look on the Object depends on the geometry structure you have in the Edit Mode!
Before we move into the more serious stuff, there are two more Edit Mode tools we need to get acquainted with. These are Knife and Mirror tools. The first one - Knife, allows you to freely create new Verticles and Edges around the Object's surfaces. It becomes very useful when you need to cut out an irregular shape or divide part of the geometry. Speaking of dividing, Knife tools also have the alternative working mode which is called Bisect - it allows you to cut through the object as you did it with a literal knife :-)
The other tool I'll be covering below is the Mirror Tool - something that allows you copying parts of the geometry and making things symmetrical. The symmetry can be also achieved in alternative way, using a Modifier instead. Just jump into the video to learn more about all of it!
● K Key → Activate the Knife Tool in Edit Mode
● Ctrl + M → Activate the Mirror Tool in Edit Mode (you need to press X, Y or Z to define the axis)
We now have a solid foundation to move to the real stuff! Subdivision Modeling part of this course is an introduction to something that professional 3D artists do on a daily basis - creating 3D models which can be later used in video gamer, renderings, client presentations etc. Subdivision Modeling will require a bit different look and approach to 3D models you already know, but I'm sure you've followed all of the previous lessons carefully and are now ready to just jump into it!
● E Key → Extrude Tool in the Edit Mode
● Ctrl + B → Activate Bevel Tool in the Edit Mode
● Alt + Left Click → Select Edge Loop (row of Verticles / Edges / Faces) in the Edit Mode


Video 20 will be the final part of the Absolute Beginners Course - after following and finishing it you will not be an absolute beginner anymore! This time we will model a Gondola meme creature - I simply find it very nice looking, charming and I hope you'll have a lot of fun while making it. We will also create a small, minimalist environment around the Gondola to practice more general, 3D Blender skills!
● Alt + G → Reset Object's Location
● Alt + R → Reset Object's Rotation
● Alt + S → Reset Object's Scale
● Alt + F → Fill selection with new Faces in Edit Mode
● Alt+ H → Unhide Everything
● Shift + H → Hide Everything Except Selection
● Shift + N → Make Normals Consistent in Edit Mode
● Shift + Tab → Activate Snap Tool
● Ctrl + I → Invert Selection
● I Key → Activate Inset Tool in Edit Mode

Soooo as mentioned in the video, we have reached the final point of this Course! I really, really want to thank you for sticking around this long and I really believe you've started loving Blender at this point! Of course, your Blender education doesn't end here - it actually starts and you've just opened the doors to becoming much more creative by exploring more and more 3D things with the help of Blender!
We'll be now continuing to exploring the Materials, Textures, Shaders and Rendering settings in Blender 2.8! Stay tuned and feel free exploring completely free Chocofur assets we've linked down belo.
Happy Blending!