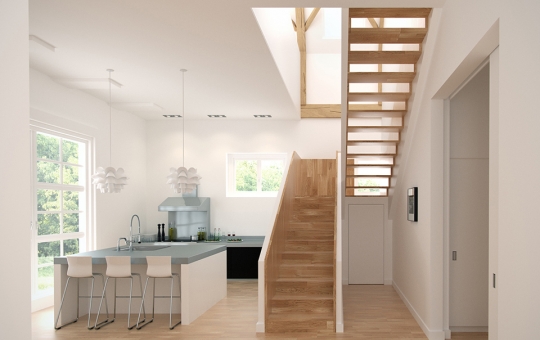
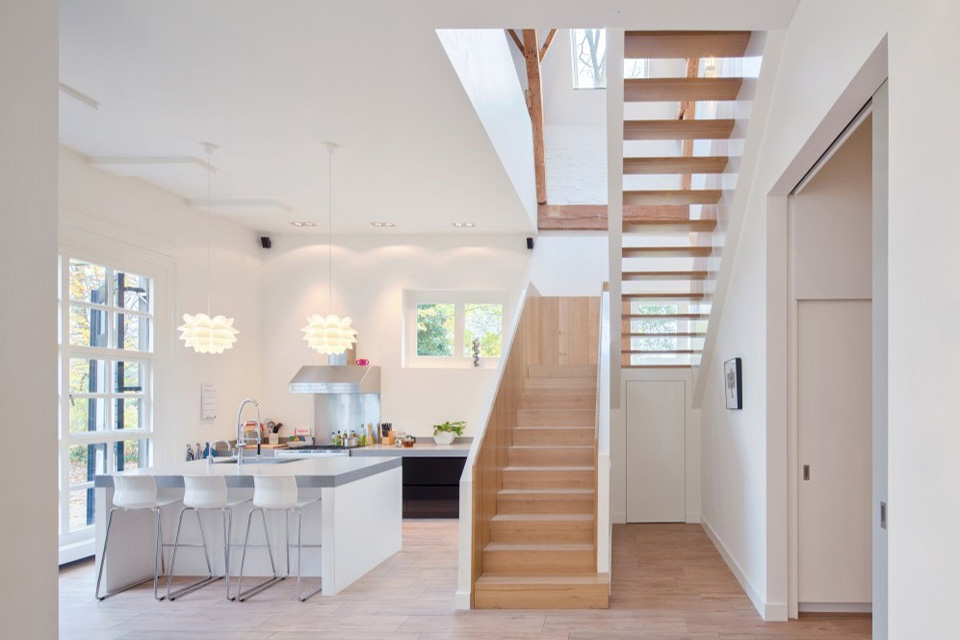
In this tutorial we'll be modeling our scene basing on the photography found in the Internet. A good way to look for inspiration is to browse architecture based websites or blogs. There you can find hundreds of interesting projects and very often, authors publish both interior pictures and the floor plans. The project I've chosen to re-create in 3D is called "House Breukelen" and was designed by Zecc and BYTR Architects.
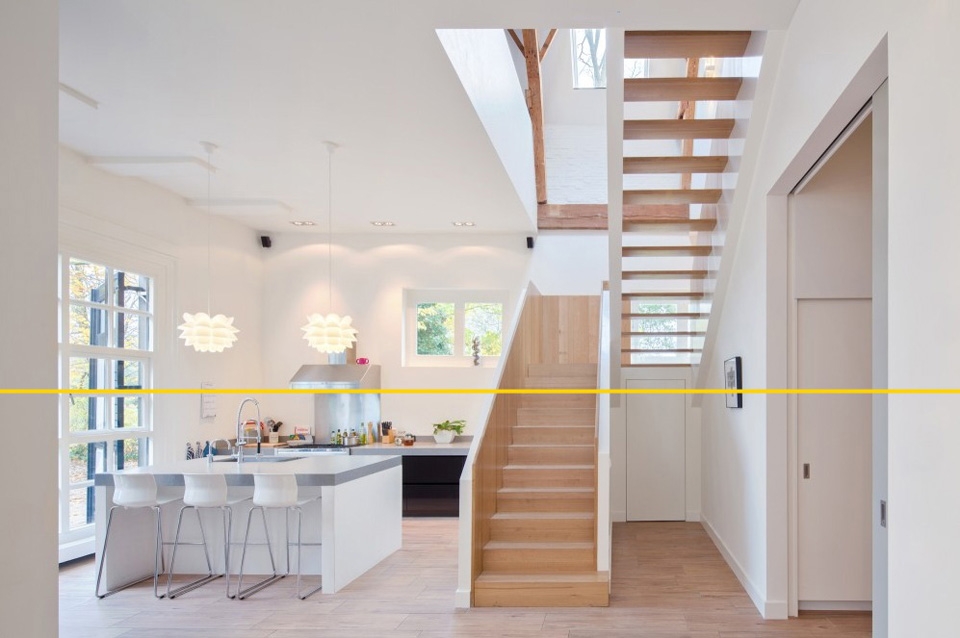
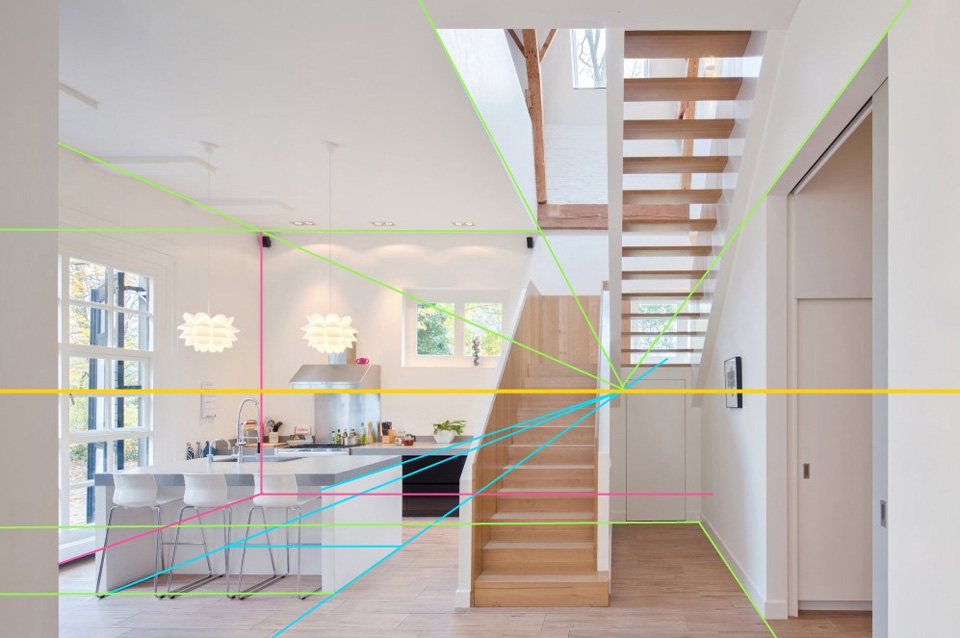
To match the perspective in Blender, we first need to create some guiding lines in 2D application. I'll be using Photoshop but this can be also done in Gimp. We start by creating "horizon line" defining on what height was the camera placed while taking the photo. This line can be found by looking at the picture and finding all the horizontal lines (window mullions, and doorposts for example) going parallel to the picture upper and bottom edges.
Now we'll extend floor, walls and ceiling edges so they cross the horizon line. They should always meet in one or two joint points. You can also try extending the lines of other elements like tables, doors and windows. Using different colors will help you not to get lost in all this line work later in Blender.
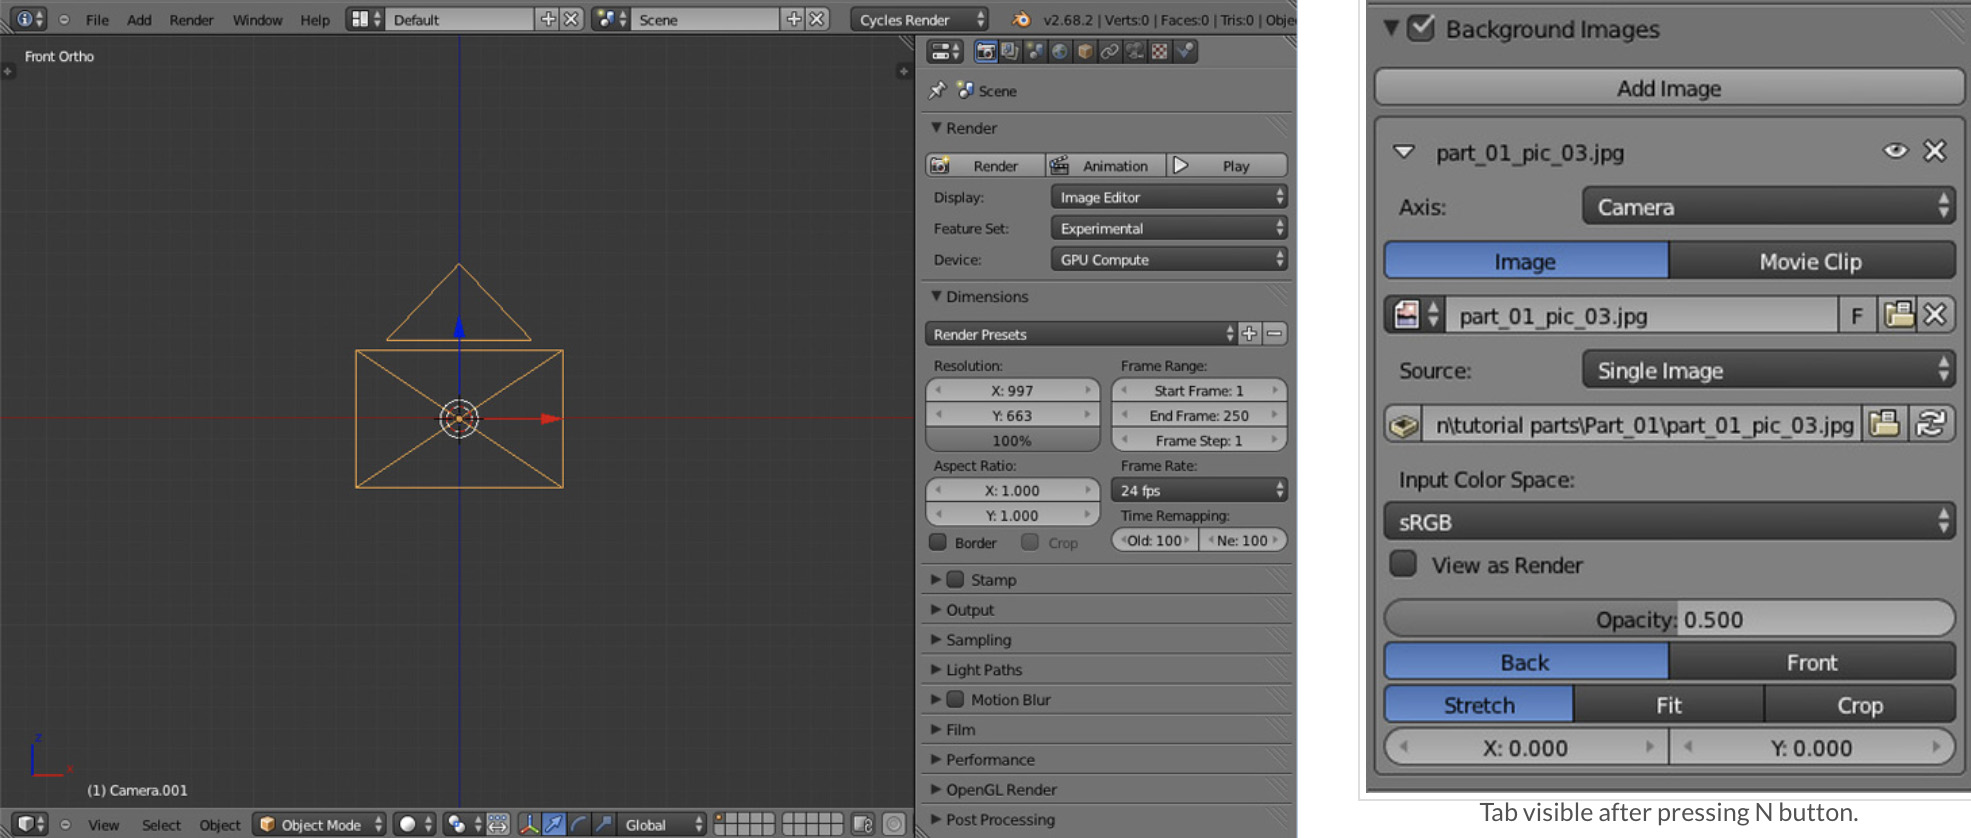
Create a new scene and in 3D view press N button. Find Background Images toolbar on the right panel that popped out. Check the box, click Add Image button and then Open button to add the background image. As image axis choose Camera.
Next, set the 3D view to Front Ortho (Num1 by default) and add camera by pressing Shift + A. Go to the Render options and change the camera's resolution to the exactly same one, as in the picture we've imported to the background. In our case, if you've downloaded the line work picture from this tutorial, the resolution would be: 960 x 640.
Now the hard part begins. Usually when matching 3D camera to photography you can check the exif data that camera leaves in graphic file. This data includes all the information about camera model,, lens, exposure etc. Unfortunately in our example we have to do everything manually...
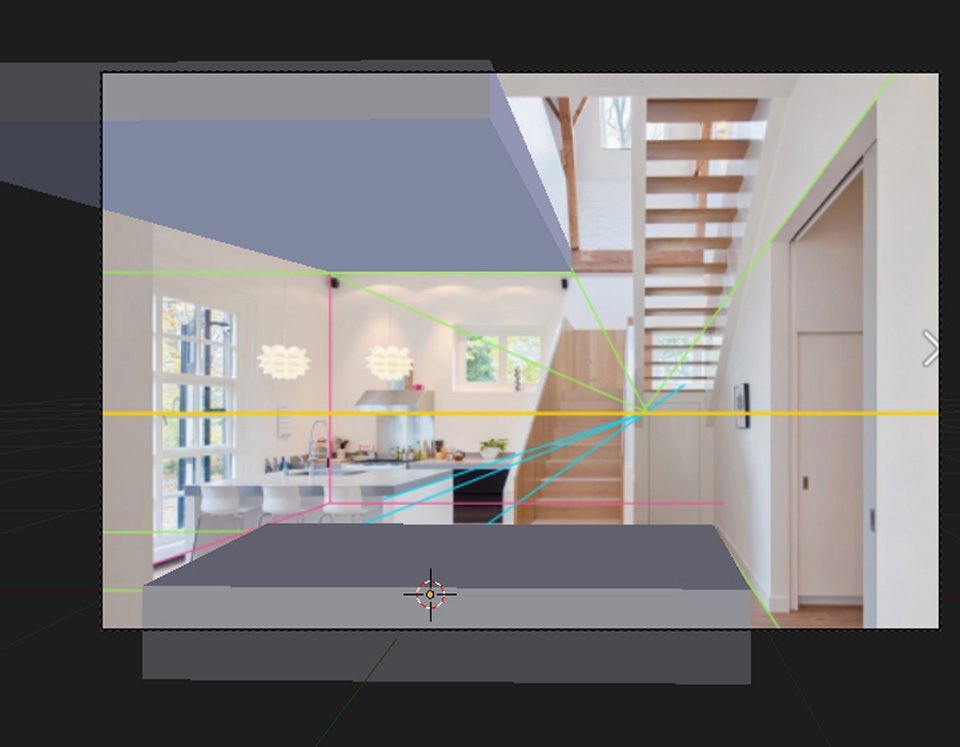
Start with moving your camera slightly back and upwards from the scene center. Create a cube, scale it down and roughly check how it matches our default camera settings. Try editing the cube so its left and right faces would be roughly aligned to the green floor lines of the background picture. Copy the object and move it upwards trying to match the ceiling lines.
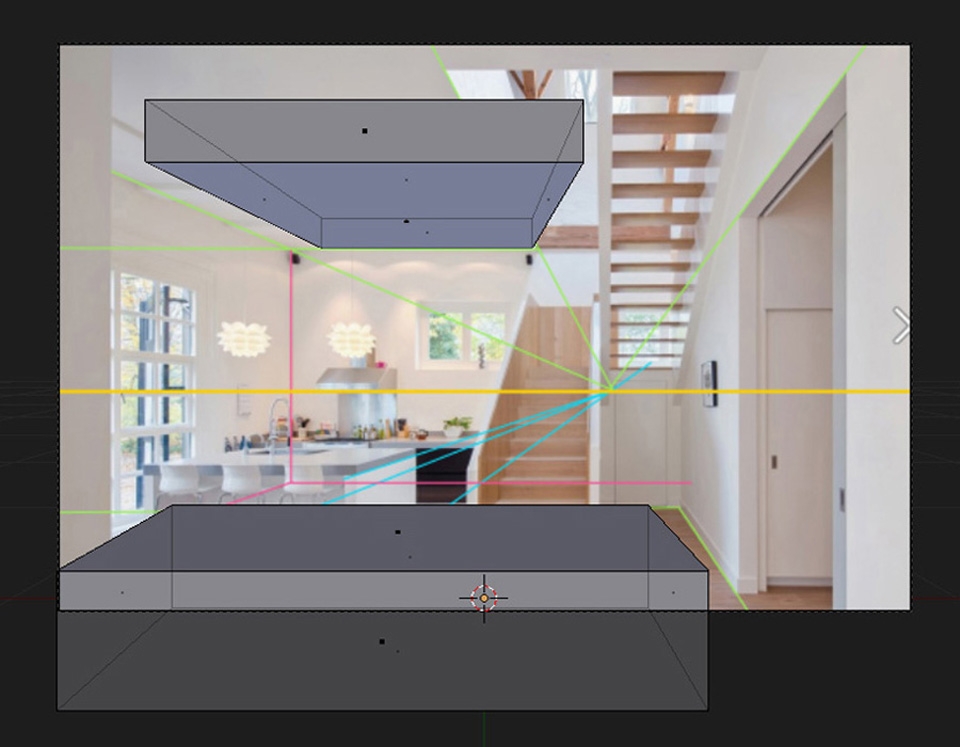
As you can see, our camera perspective looks totally different to the one from the background picture. Press dot on your keyboard and with your 3D cursor centered to the scene (Shift + C), select your camera and try rotating it slightly to the right..Edit your modified cubes so they look more aligned to the background.

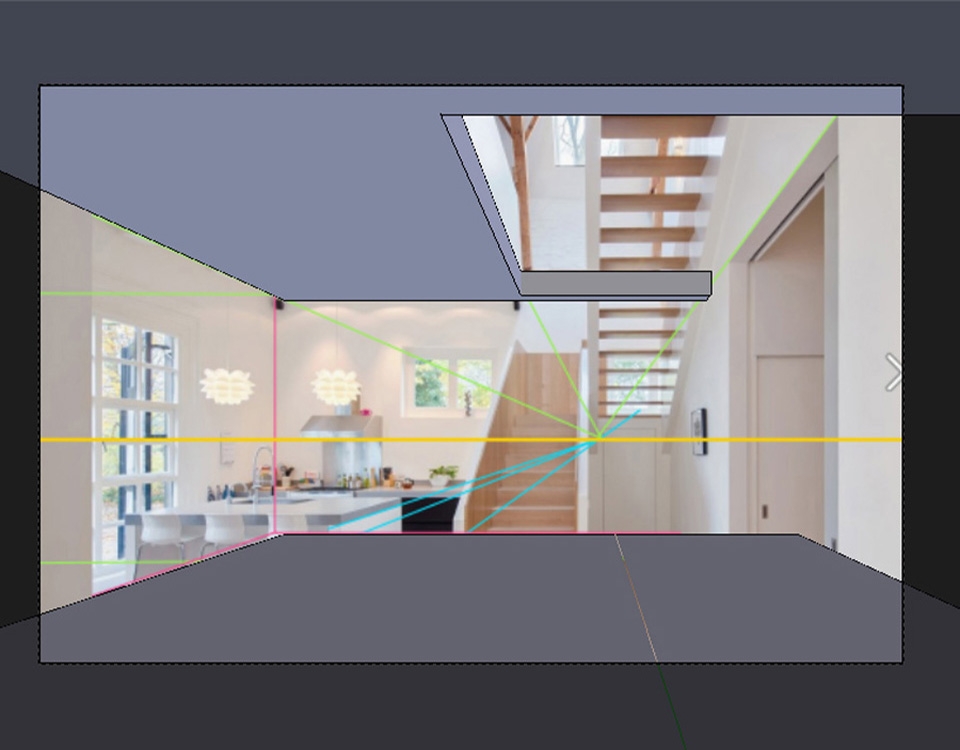
As you've probably noticed, there can't be much done just by rotating the camera and changing its position. Now we need to edit the focal lens and look for value that would work best in our example. I'd personally recommend sticking to some of the industry standard lens values like: 80, 50, 32, 28 or 24 as it gives us much bigger possibility of finding the correct one.
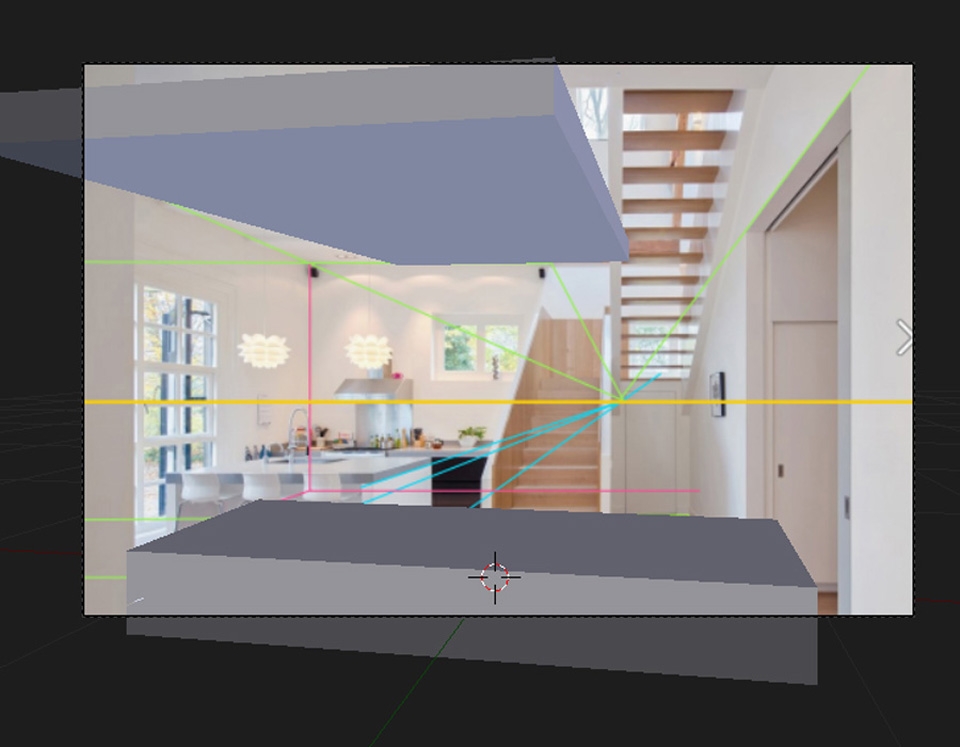
After working with the scene for a few more moments I've reached another limitation - although adapting our 3D cameras lens to the one from the picture gets us closer, I have forgot about one, very important thing - architectural pictures are very often manipulated in 2D applications for correcting their perspective. For more explanation I suggest quickly going through this website.
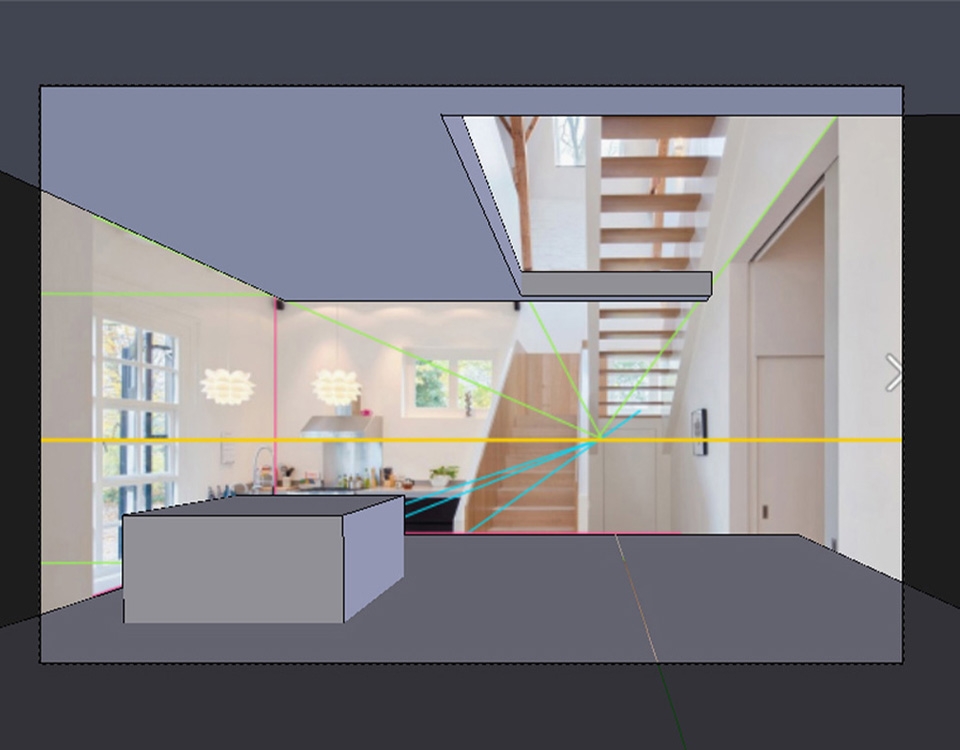
As the shift lenses used for perspective correction are usually quite expensive, most photographers fix this issue in Photoshop. This makes our work even harder as we don't actually know how the original picture looked like. However, Blender gives us a cool tools to solve this problem. Select your camera and under the Focal Lens parameter you'll find Shift values. This enables us to remove both horizontal and vertical distortion.
(this time rotate without using 3D cursor).
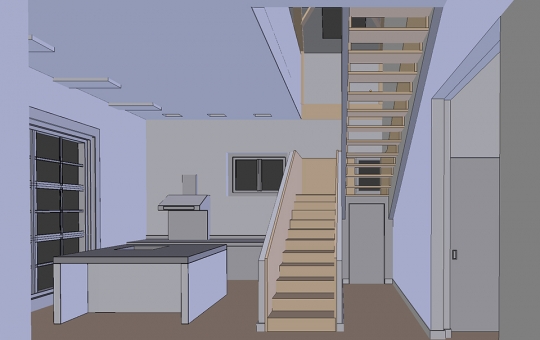
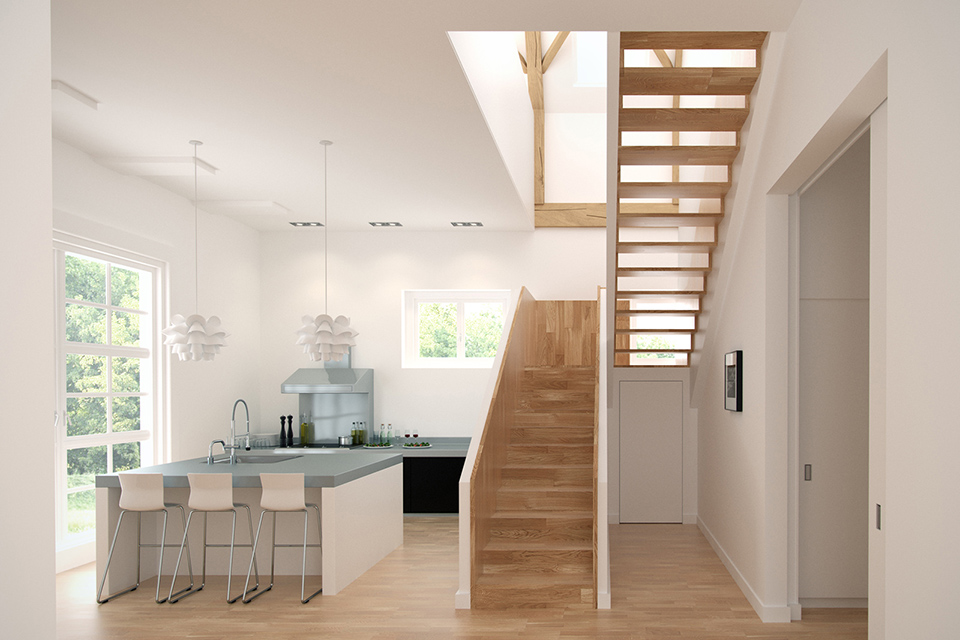
Equipped with the tools, Blender provides, we now need to try many different camera shift value/position/rotation variants. It's actually easier said than to be done, but even for me it took over 30 minutes to get the result I was satisfied with. Keep in mind that you may need to add another pieces of geometry to gain more guide points for your camera. Eventually, the settings I've used for the camera lens were:
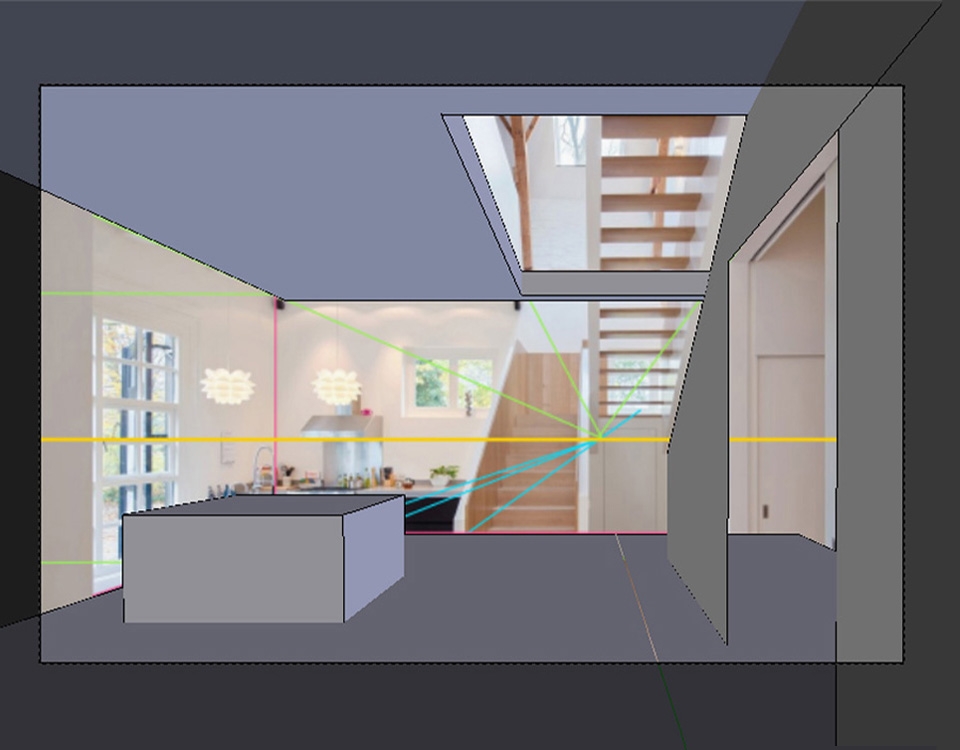


As you can see, I've not only added the cube in the place were table is located, but I've also cut the window openings and doorways. All of these newly created guides allow me to better match the perspective.
The process of matching 3D cameras and photography was never an easy topic, but I'm sure you'll finally get there after practice.