The modeling topic has been divided into two, separate parts. In Basic Modeling I'll try to explain fundamental methods of creating interior geometry elements such as walls, stairs, windows etc. I won't be able to precisely describe every single model you find on the reference photography as the whole tutorial would become unreadable. However, by following the basic principles I really hope you'd be able to create everything necessary by yourselves. So, let's get started!
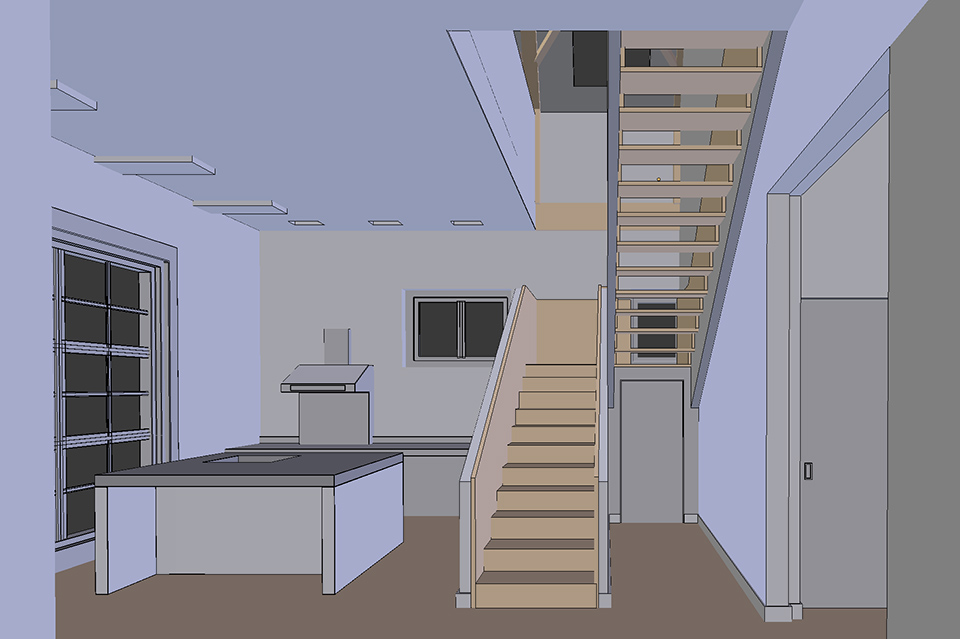
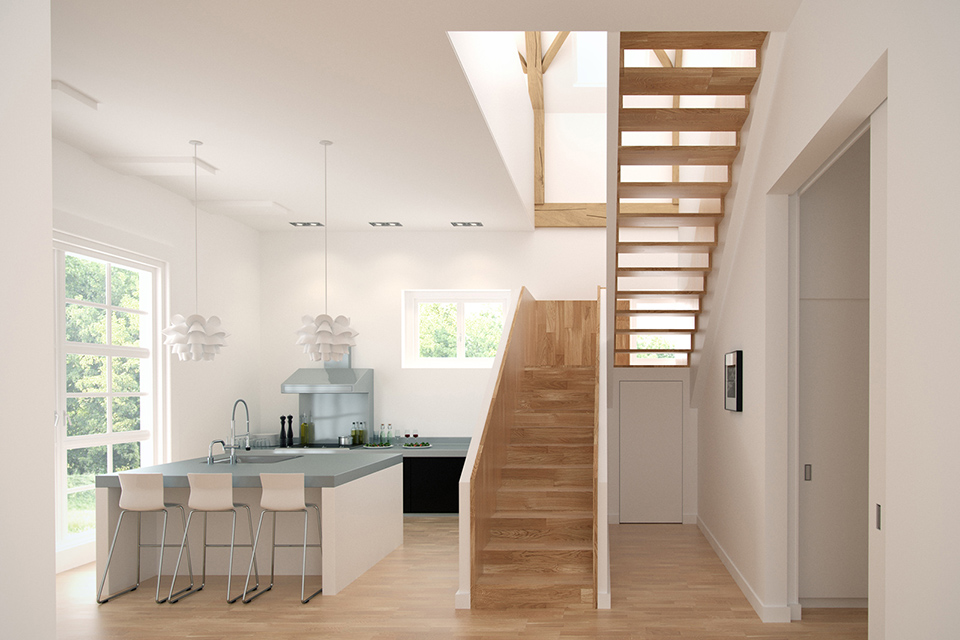
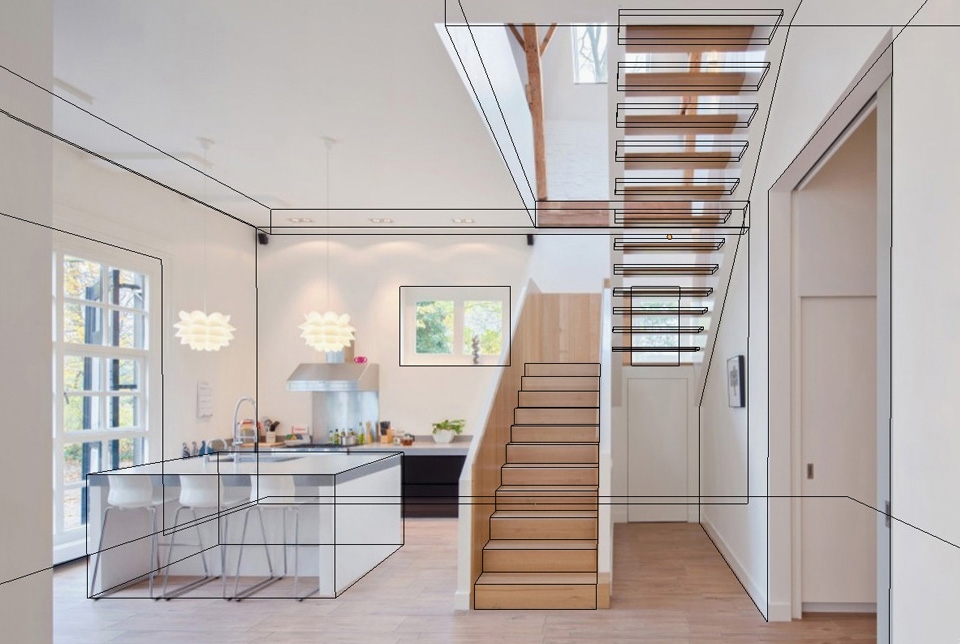
With our camera set up and some basic scene elements added, we can now progress to refining the geometry. I start by creating the staircase - actually it's now pretty straightforward as we can just model sticking to the picture's perspective. To make sure your stairway steps have similar sizes, try refining them more both in top and front view. Remember - our aim is not to re-create the picture in 110% but have a nice, final effect.
The lower steps were created from a plane mesh, extruded up and forward. The upper is just a cube mesh,, aligned by scaling and matching with the planks visible in the picture:
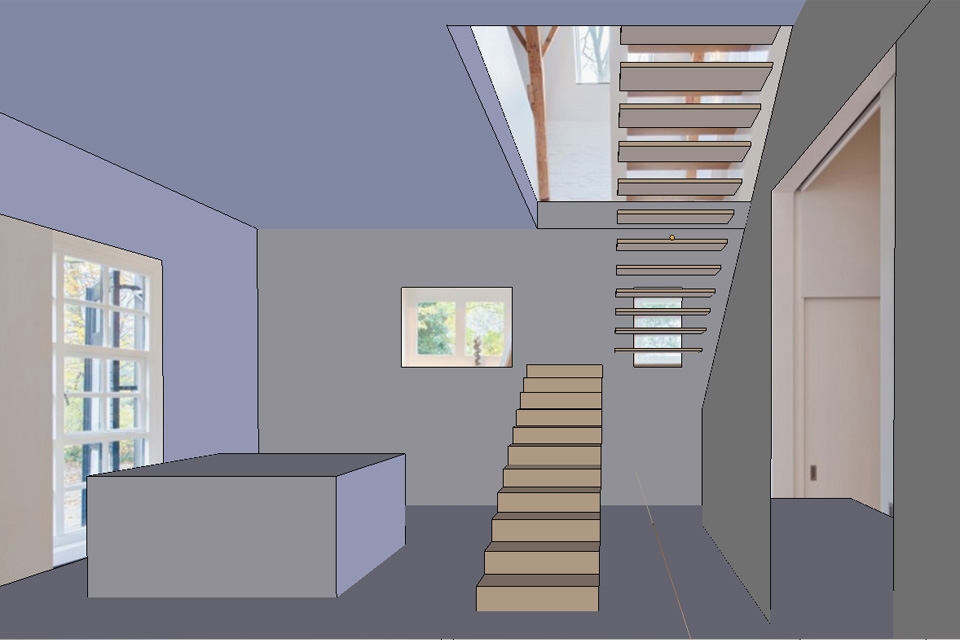


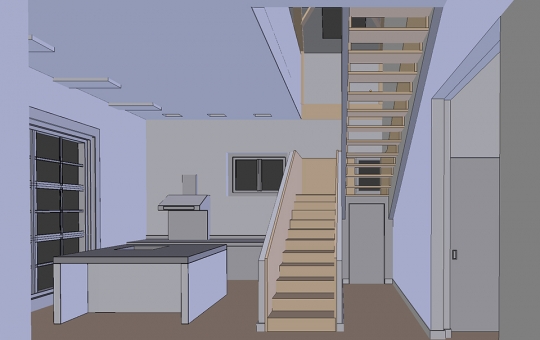
As you can see, With basic scene elements added, we no longer need the perspective guidelines. For better display you can also use Display -> Wire option under the Object Properties tab. I also suggest creating some basic materials and applying them to scene models (light brown for wood in our example). Just by adding and basic editing a few cubes, I've created wall on the left, part of the handrail and a doorway base under the staircase.
If the previous step wasn't totally clear for you - don't worry (and be happy). Here we gonna focus much more on ways of editing the geometry in Blender.
The best way of presenting different modeling tools will be creating a table model standing on the left. Let's start with hiding all the other scene elements. Select cube representing the table and hit Shift + H. This will hide everything except of selected object. To unhide, press Alt + H These shortcuts work both in Object and Edit Modes. Press Tab to enter Edit Mode and switch to Wireframe view. Using Ctrl + R shortcut, create new edge loops matching the table shape.

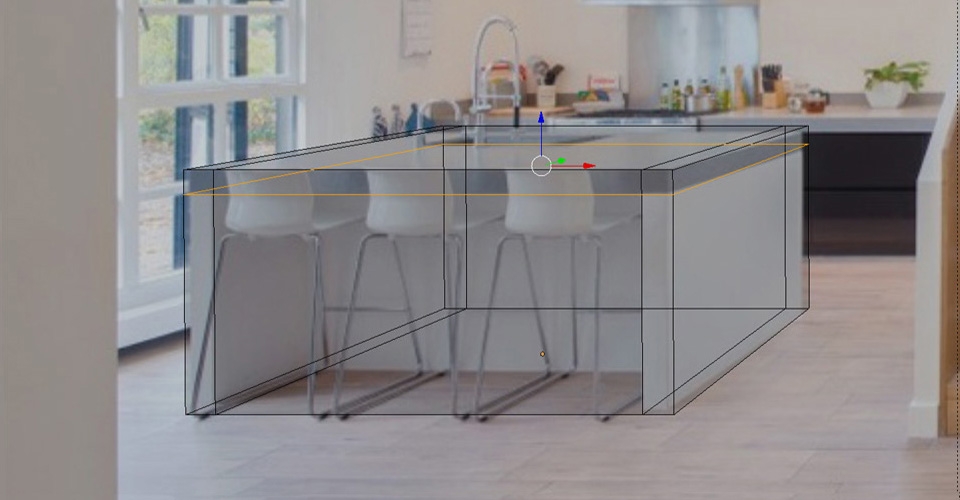

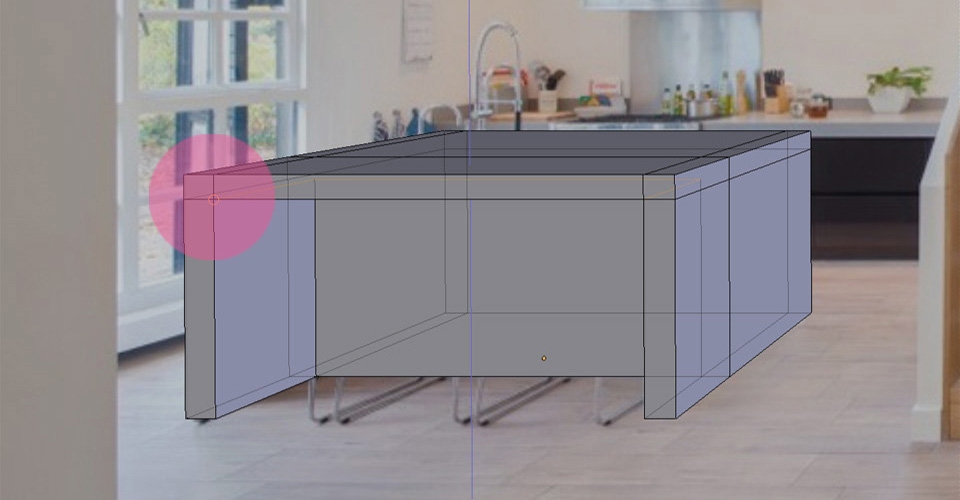
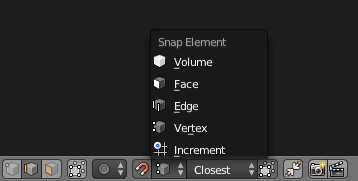
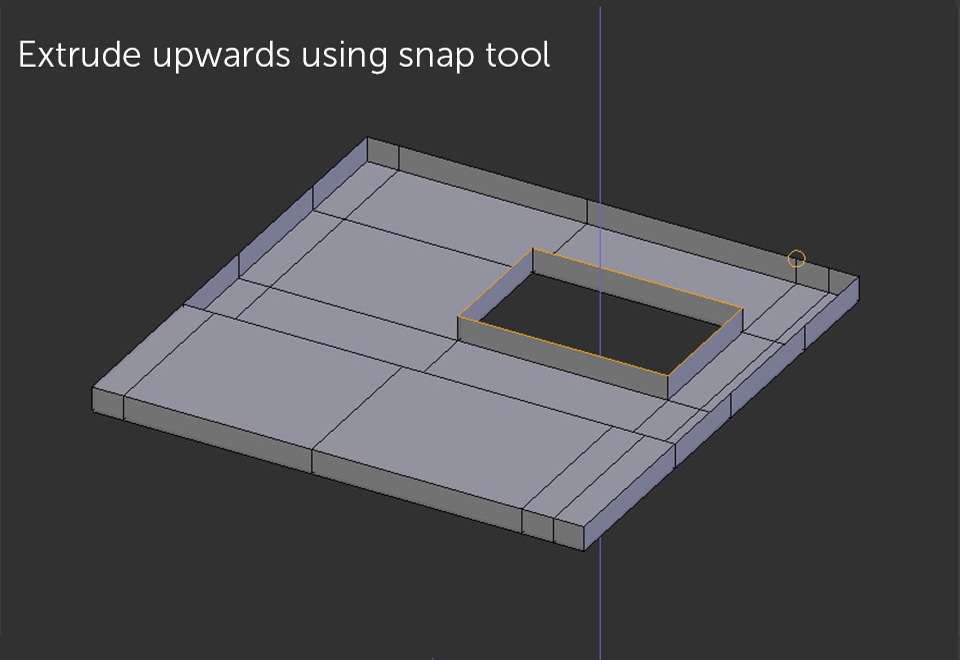
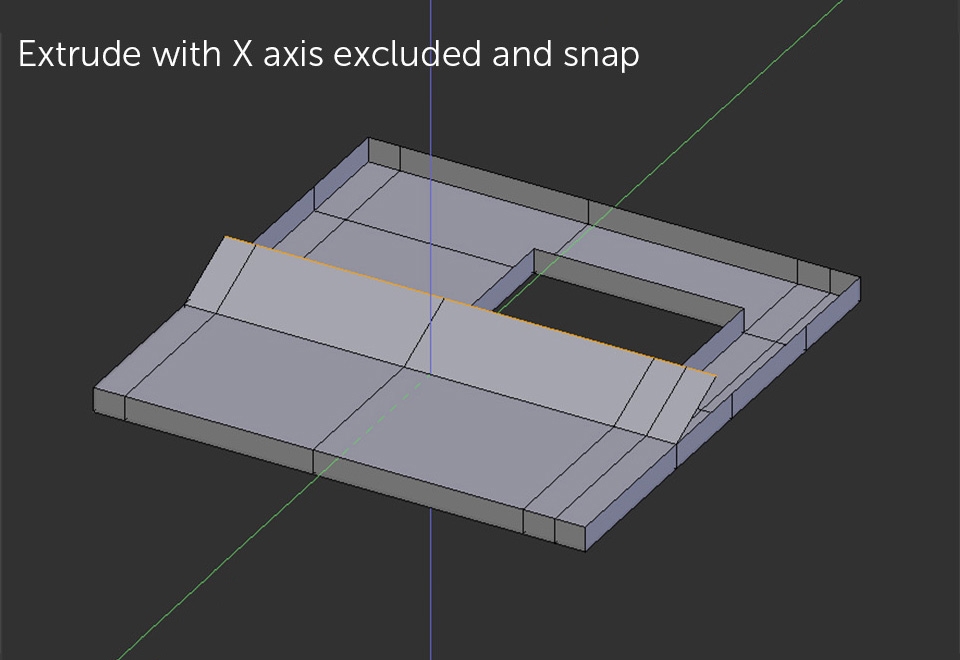
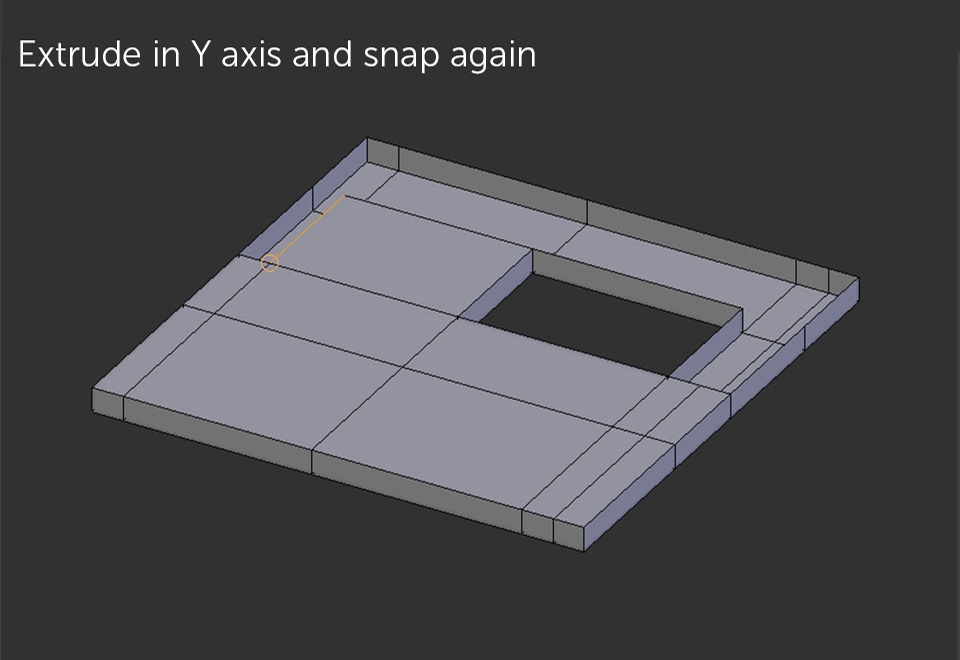
Delete two front, non existing faces and select three bottom edges. Press E button and extrude them upwards, locking the vertical axis by pressing Z. To align the newly created faces height, press Shift + Tab to enable snapping tool. Change mode from "Increment" to "Vertex", press G button to move selected edges, and hit Z again to lock the vertical axis. Move your mouse cursor to the left, upper corner of the newly created facet - it will automatically snap to the desired height
Let's leave the camera view for a moment and focus on the newly created faces (press Num dot for zooming to selected object). First we need to remove doubled vertices at the snapping points. The quickest way of doing this is selecting the whole model by hitting A button, then pressing W for Specials Menu and choosing Remove Doubles. We still need to fill the empty space under the table top.. Hold Alt key and right click on one of the edges to select the opening outline and press F to fill it.

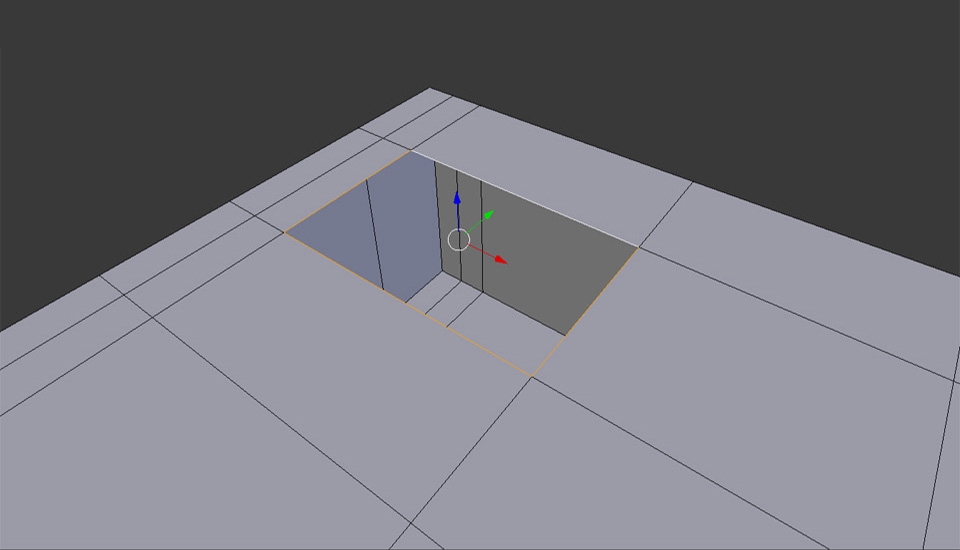
Let's return to camera view by pressing Num 0 key and create sink opening. Add new edge loops surrounding the opening and delete newly created face Alt + Right click to select the outline, E + Z to extrude four new faces vertically and F for closing the element.


This way we're able to create simple shapes representing furniture pieces you'd probably have to build every time doing interior visualizations. It would be nice to add some extra details but first we need to learn little more about other modeling tools Blender has to offer.
Bevel is a great tool for quickly adding subtle finishing to non-subdivision geometry. What the tool does is rounding the edges of your models so they look more natural and not so razor - sharp as a default, newly created cube for instance.
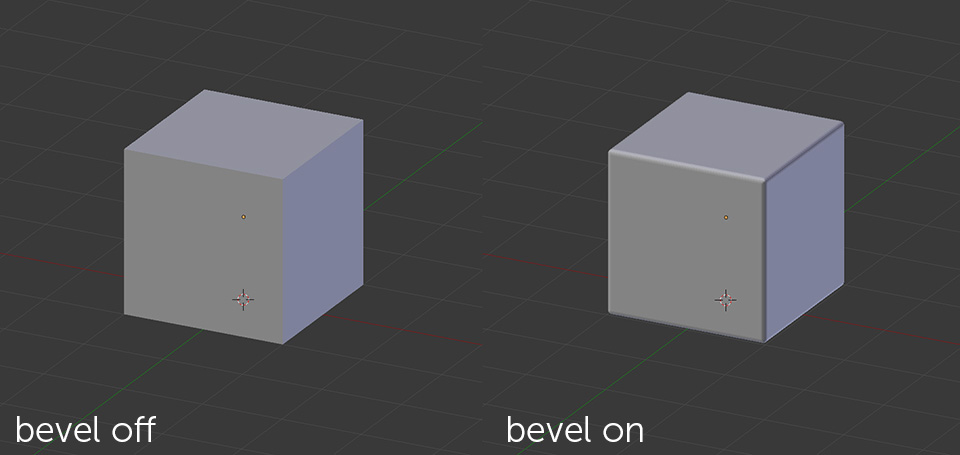
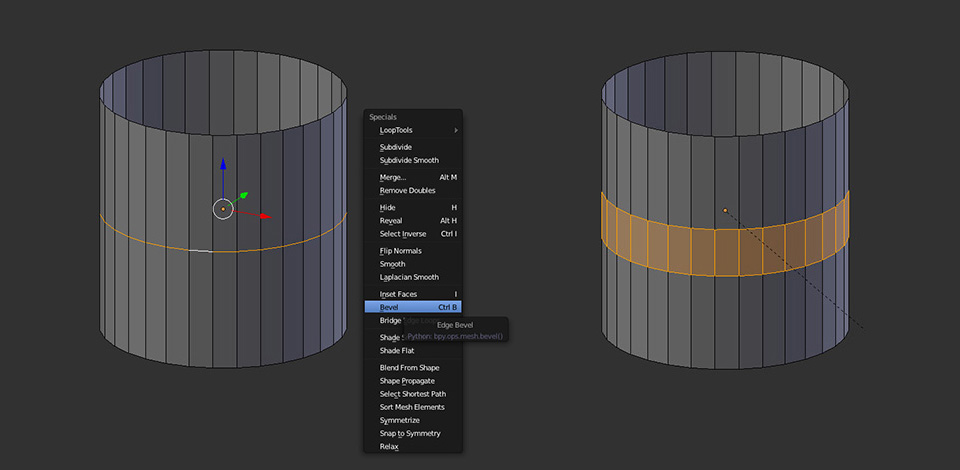
Bevel can be used both as a modifier added in Object Mode or a tool in Edit Mode (you find it after .pressing B under Specials menu). The choice actually depends on your needs - sometimes it's good to have the ability to tweak the edge roundness level in every modeling stage - this is when a modifier would be a good option. On the other hand, there are situations where you just need to add some details to your geometry and this is when working in Edit Mode gives best results.
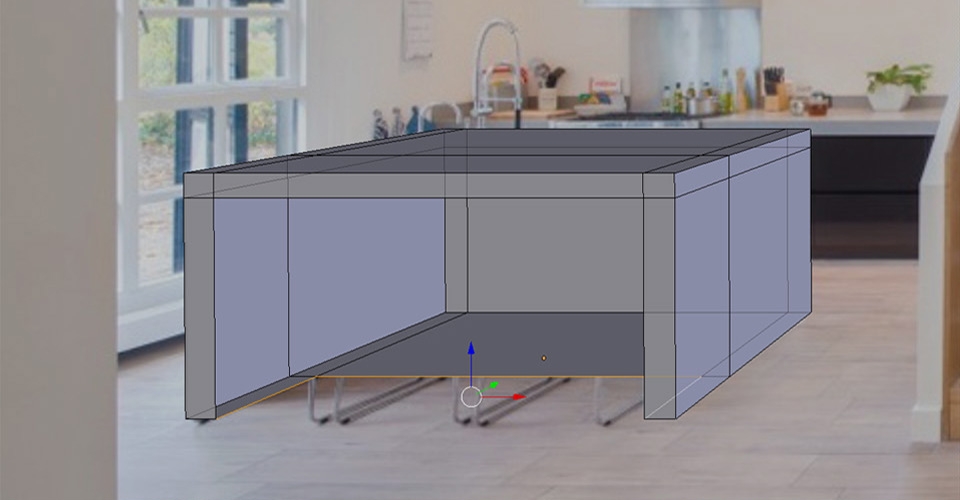
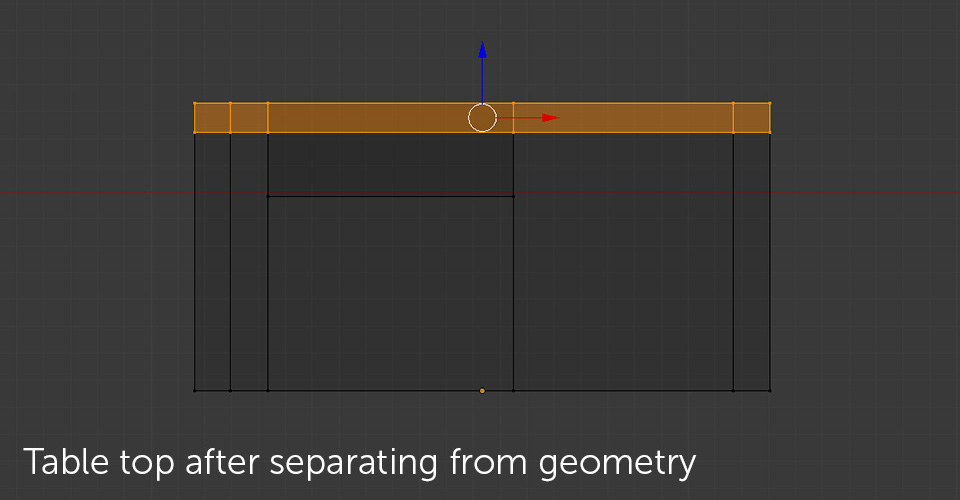
Before we start finalizing our table, we need to split the table top from the bottom elements first. Let's select our object and isolate selection by pressing / on the Numpad (this is another way of hiding/revealing objects in your 3D viewport). Switch to front view and enter Edit Mode. In vertex selection mode, select two top rows of vertices and press Y button to separate them from the unselected geometry.
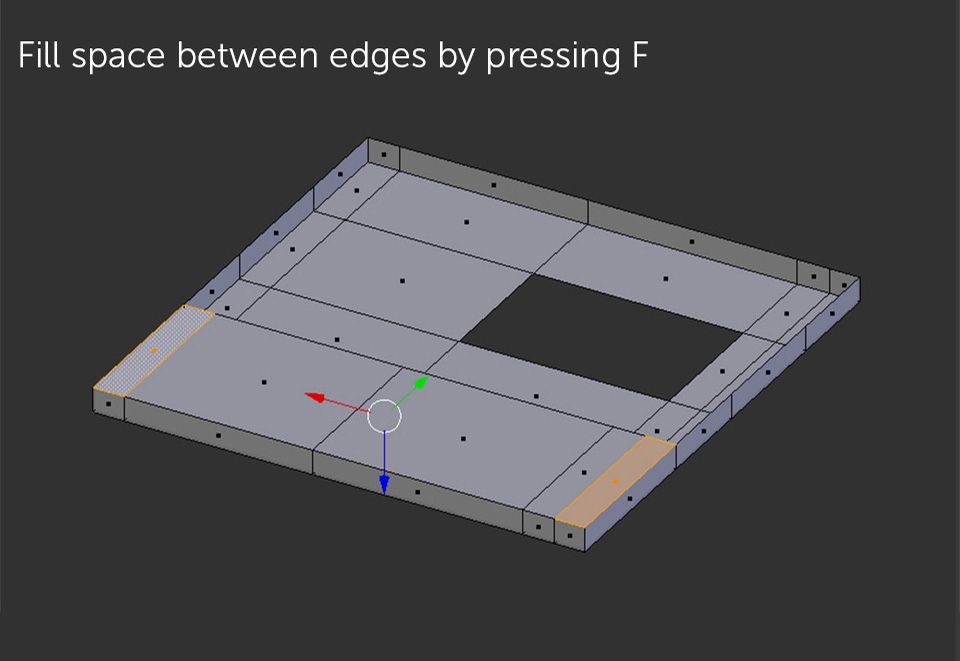
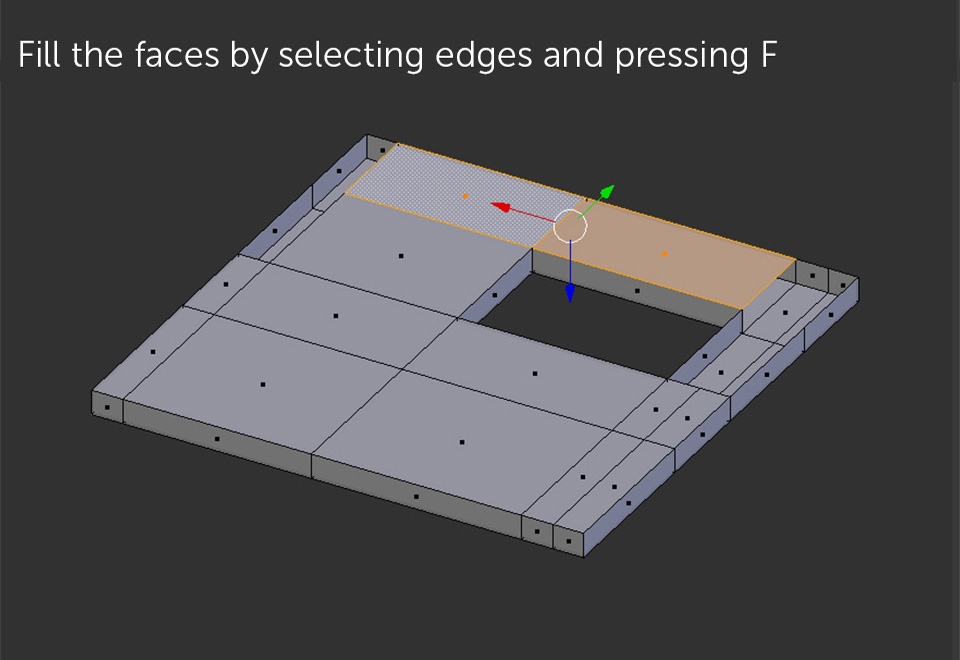
What we'll do now is "closing" the geometry volume so it has no "empty" faces. This is a bit boresome but necessary process if we want bevel tool to work properly. I don't recommend filling the faces automatically just by by selecting the openings (Alt + right click) and pressing F key as this will very often generate some geometry issues. Instead, spend a few seconds simply selecting the edges and pressing F key for filling the spaces between them. This is also a good chance to practice extruding and using snap tool we've learned in the previous part.
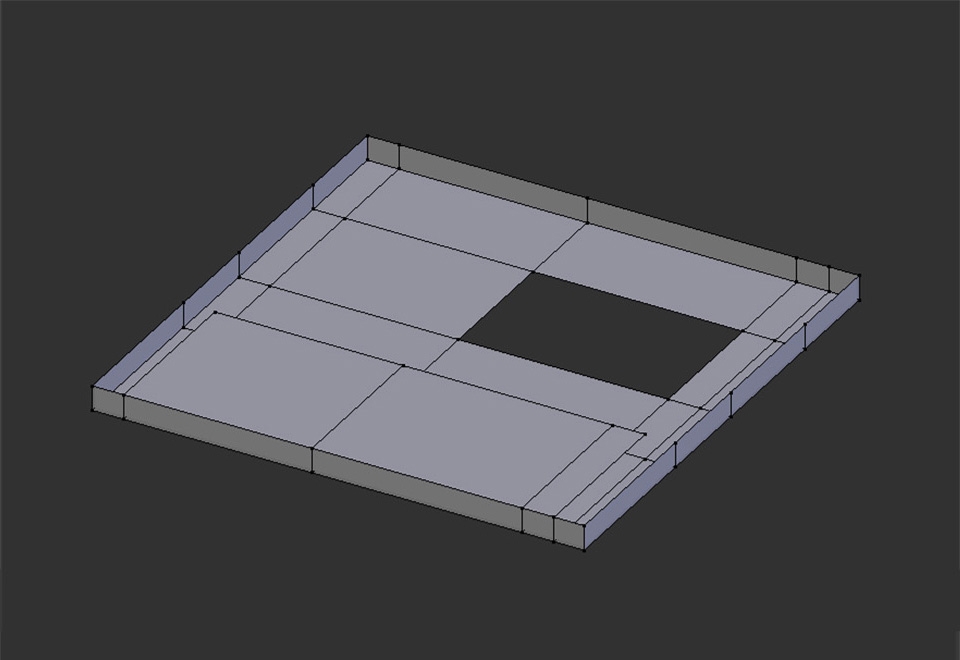

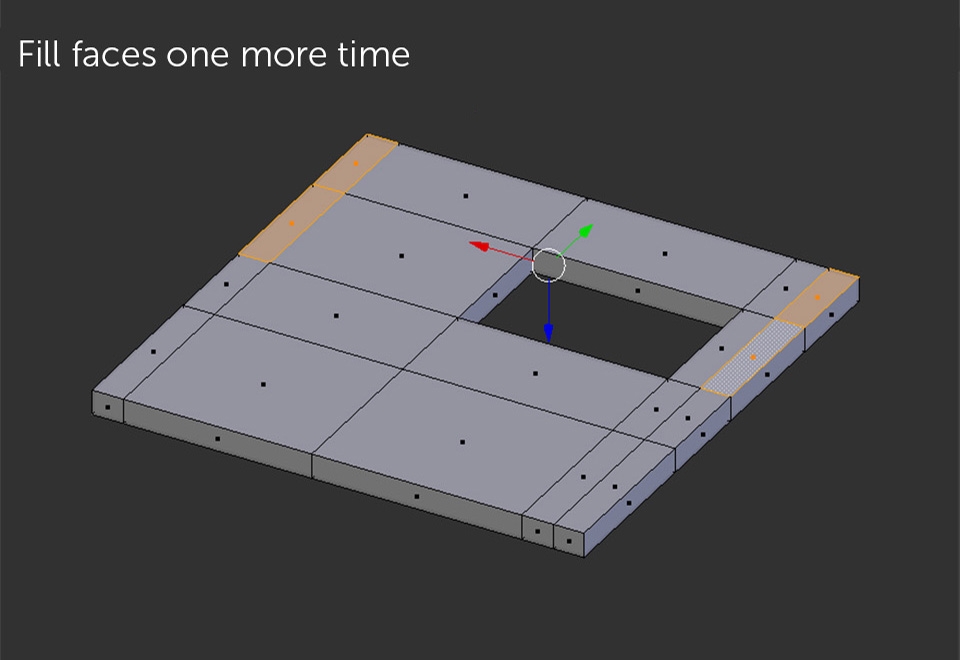
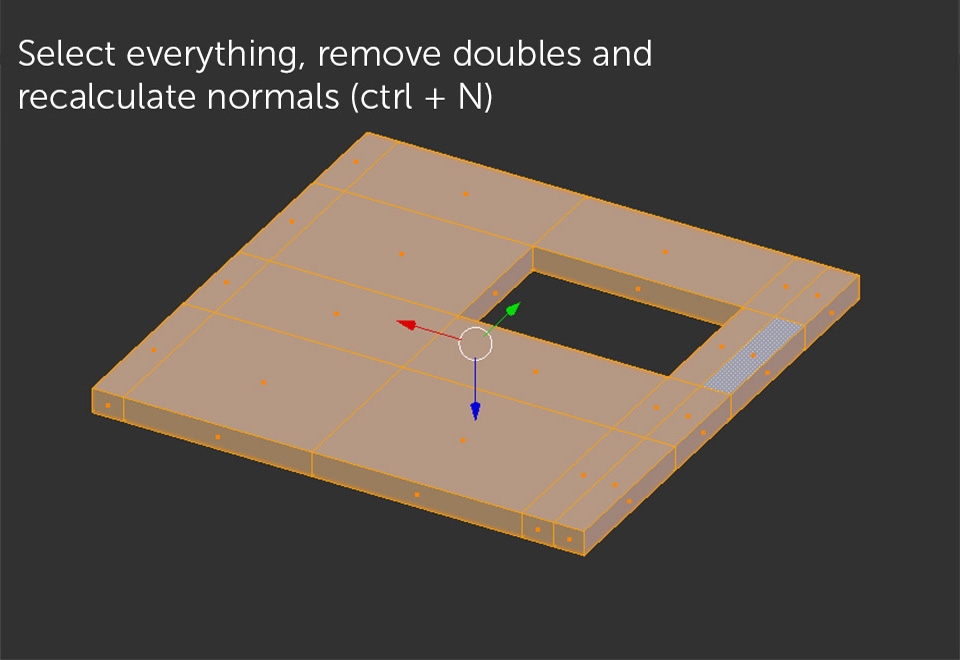
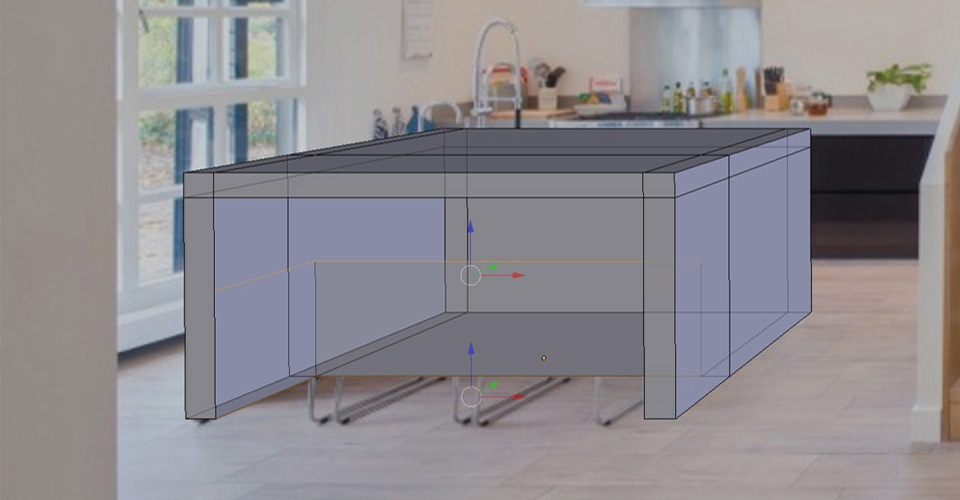
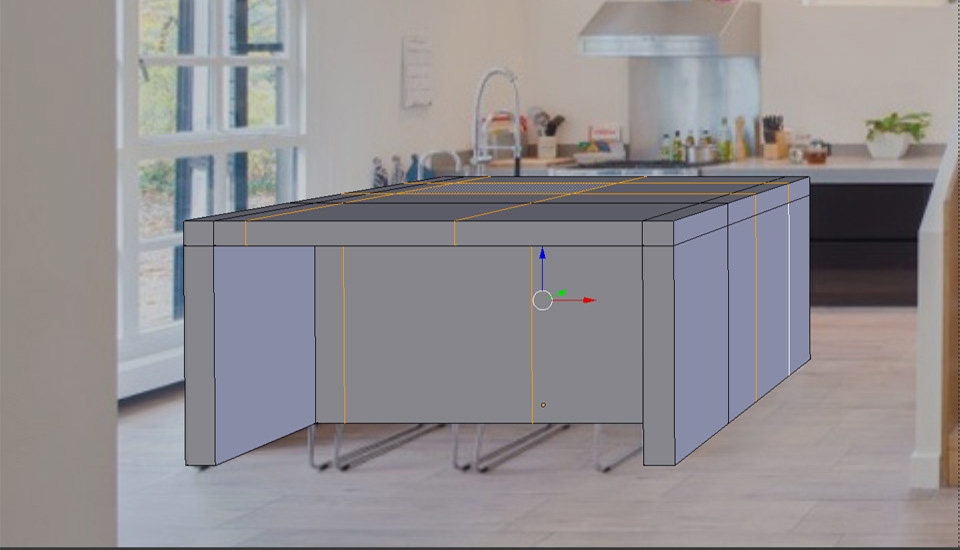
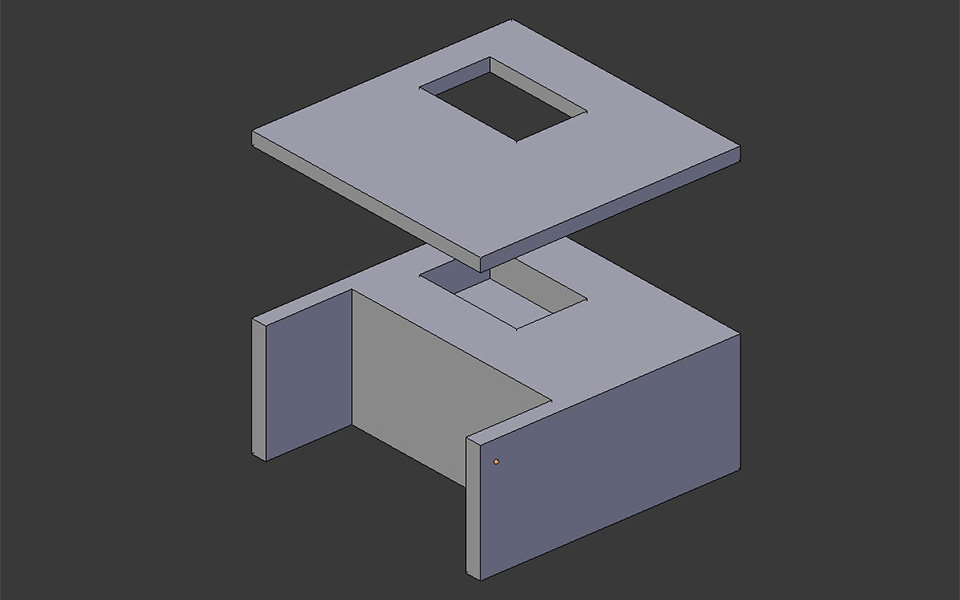
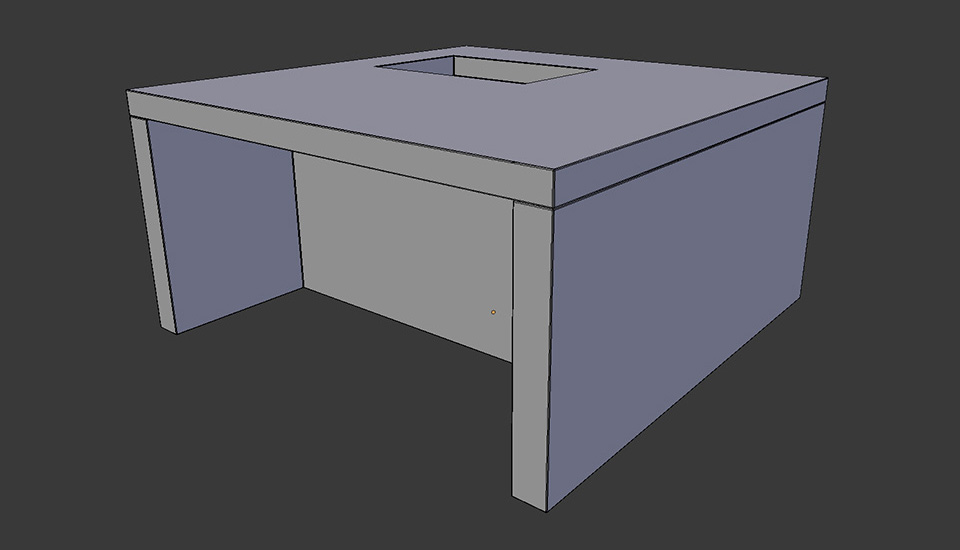
Now continue and use the same techniques to close the volume of the bottom part of our furniture. Remeber about the sink hole we neet to keep in order to model additional details later. When finished, out two table parts should look more or less like this:
When you prepare geometry correctly, using Bevel tools is pretty easy and straightforward. Try adding a Bevel Modifier yourself and test different settings or enter Edit Mode, select all geometry and press Ctrl + B. By moving your mouse you can adjust the size of edge roundness and by scrolling your mouse wheel you define the edge subdivision number. Be sure not to set the edge rounding radius too big - use Bevel tool to create a subtle lines that would actually appear on real furniture.
This is how a finalized table used in our scene should look like:
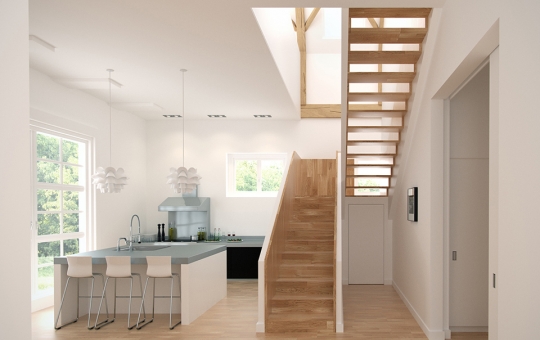
As mentioned in the beginning of this tutorial part,, my intention was not to describe every single element' modelling process but focus on the main methods and techniques used when creating basic interior furniture models. With knowledge I tried to present you should be now able to continue yourself and create objects like: walls, ceilings, missing construction elements, windows or detailed kitchen furniture.
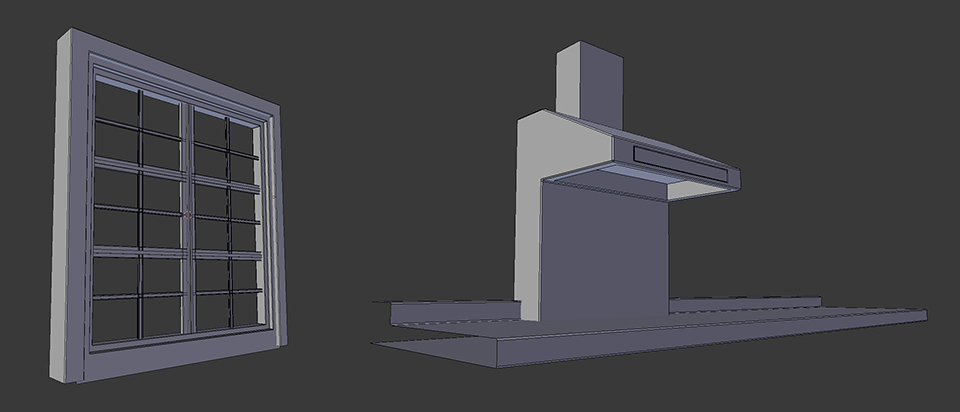
On this stage of scene modeling it's also important to keep an eye on tiny details which may not seem important at all,, but will have a big impact for the final look of our interior. These are for example: floor strips, window and door handles, etc. Before starting subdivision modeling, our scene should look like this:
A short information summary before we close this part:

I think what should be also added is to never get discouraged if you don't manage to create the model you want, trying for the first time. Modeling and 3D graphics in general require some experience and practice before you get more intuitive and comfortable with building stuff around. What I would personally do would be picking up some random, not complicated objects around me and try re-creating them in Blender